PBS 2 of X: Introducing HTML
The first baby step we’ll take towards real programming is the Hyper Text Markup Language, better known to us all as HTML. HTML is not a true programming language; instead it is a simpler beast known as a markup language – it adds context to text. HTML allows us to mark certain parts of a document as headings, other parts as paragraphs, and yet other parts as being emphasised etc. Like with programming, we are conveying meaning to the computer, but the range of possible things we can ‘say’ is much smaller and simpler.
Modern best practices for web development are the result of decades of evolution. We’re going to ignore all the techniques that time and experience have shown to be mistakes and jump straight to the end of the story – modern best practice. There have also been many versions of HTML over the years. Again, we’re going to jump straight to the end of the story, and use the latest incarnation of the Hyper Text Markup Language, HTML5.
Before we dive into the specifics, I want to take a moment to explain the larger context in which we’ll be using HTML. When HTML was originally developed, it was designed to describe both what different elements of a web page were, and, what they should look like. Experience has taught us that this is a terrible idea; so we no longer use HTML in this dual role. Instead, HTML is now just half of a duo of languages used to create a web page – the other partner being Cascading Style Sheets, or CSS. We use HTML to describe what each part of the page is, and CSS to describe how each marked up element on the page should be styled.
We’ll be moving on to CSS once we finish describing HTML. Until we get CSS, the web pages we create will look exceptionally plain and frankly boring. But don’t worry. We’ll move on to CSS soon enough, and then you can really let your creative juices fly!
Matching Podcast Episode 409
Listen along to this instalment on episode 409 of the Chit Chat Across the Pond Podcast
You can also Download the MP3
HTML Tags
Since we’re using HTML to markup text, the vast majority of a HTML document is plain text. We use so-called HTML tags to add context to that text. In general, tags come in matched pairs – an opening tag and a closing tag. The content between matching opening and closing tags is said to be contained within the tag. An opening tag takes the form of the name of a tag between chevrons. A closing tag takes the form of the name with a forward slash prefix between chevrons.
For example, the p tag is used to define a paragraph, it’s opened with <p>, and closed with </p>. The text for the paragraph goes in between the opening and closing tags. The following example shows the markup for a one-line paragraph:
<p>This is a one-line paragraph!</p>
The vast majority of HTML tags behave like the p tag. However, there is a caveat – a small subset of tags are officially defined as void tags. A void tag cannot contain any content, and has no closing tag. You can optionally add a space and a / to the end of a void tag. The hr tag represents a horizontal rule (a full width line across the page) and it is a void tag, so, the following are both valid:
<hr>
<hr />
However, the following is invalid:
<hr></hr>
I prefer to use <hr /> rather than <hr>, because it makes it obvious that the tag is void. I will be using that syntax throughout this series.
Also note that the trailing / is illegal on non-void tags. Hence, you should never write something like <p />, because the p tag is not void.
Be careful to always close regular tags. Never close void tags, because, if you make mistakes in your HTML markup, it will force browsers into so-called quirks mode. When that happens, all bets are off – the results will be unpredictable and inconsistent, causing you nothing but headaches. Aim never to write quirky code!
The Structure of a HTML Page
When we ignore archaic concepts like frames (which we will do in this series), all HTML documents have the same basic structure.
HTML pages should all start with a so-called doctype tag. This is a special tag that does not follow the normal rules, and tells the browser what version of HTML to interpret the remainder of the document as. If you omit the doctype, the browser has no choice but to guess, and like unmatched tags, that can result in inconsistent and unexpected behaviour. For your own sanity, always use a valid doctype at the start of your HTML documents!
The exact text you should use for the doctype has changed immensely through HTML’s evolution – growing ever more complicated until enough was finally enough, and the slate was wiped clean for HTML5. The correct HTML5 doctype is short, to the point, and easy to remember:
<!DOCTYPE html>
Note that a doctype tag is void, should never be written with the trailing /, and that the capitalisation must be as shown above.
After the doctype declaration, the entire document is contained within a single html tag. The html tag should be opened directly after the doctype, and it should be closed on the last line of the document.
Within the html tag the document is broken into two sections, defined by two tags. The head tag comes first, and contains metadata about the document like the title browsers should display in the page’s window or tab title bar. This is followed by the body tag which contains all the page’s actual content.
You should always use the UTF-8 character encoding for your web pages. It’s good practice to explicitly tell the browser that you are doing so by including an appropriate meta tag inside the head tag. Again, if you don’t specify a character encoding, the browser will have to make an educated guess, and it could guess incorrectly! The meta tag is void; so it should never be closed.
A basic HTML header should look something like:
<head>
  <meta charset="UTF-8" />
  <title>PAGE TITLE</title>
</head>
Putting it all together, this is the template you should use for all your HTML documents:
<!DOCTYPE html>
<html>
<head>
  <meta charset="UTF-8" />
  <title>PAGE TITLE GOES HERE</title>
</head>
<body>
PAGE CONTENT GOES HERE
</body>
</html>
Comments in HTML Documents
You can think of comments as hidden notes that are for the benefit of developers, and are ignored by browsers. They are there for you to leave little helpful notes to your future self, explaining what your code does, and perhaps why you chose to do it one way rather than another.
In HTML, comments are added using a special tag of the following form:
<!-- COMMENT TEXT GOES HERE -->
Comments can be spread over multiple lines, and can contain other HTML tags. Hence, comments can be used to temporarily make a part of a HTML document vanish from view.
Working Example
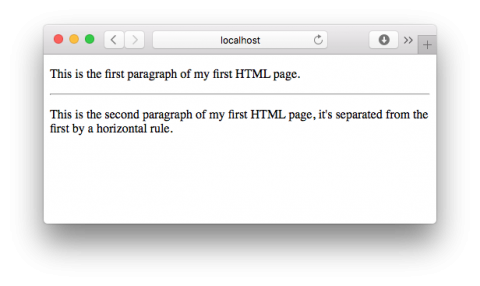
Let’s pull everything we have learned today together into a final example – a simple web page that contains two paragraphs separated by a horizontal rule.
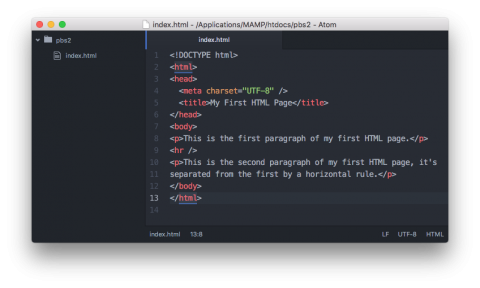
Using the skills we learned last time, create a folder called pbs2 in your web server’s document root, and using your favourite programming editor (I recommend Atom), create a new file called index.html in that folder.
Add the following HTML code to that file:
<!DOCTYPE html>
<html>
<head>
  <!-- Define the Character encoding -->
  <meta charset="UTF-8" />

  <!-- Set a title for the page -->
  <title>My First HTML Page</title>
</head>

<body>

<!-- The page's content goes here -->
<p>This is the first paragraph of my first HTML page.</p>

<hr />

<p>This is the second paragraph of my first HTML page, it's
separated from the first by a horizontal rule.</p>

</body>
</html>
Once this file is saved, and assuming your web server is running, you should be able to view your newly created page at the URL http://localhost/pbs2/.