PBS 1 of X: Introduction
Computer programming is a very powerful skill – it literally lets you tell computers exactly what to do. Contrary to what you may believe, learning to program is not about learning any specific programming language,but about learning the principles shared by all languages. Once you grasp the fundamental principles, you can move from language to language with relative ease. In my two decades of programming I have programmed in X86 Assembler, BASIC, C, C++, Java, JavaScript, Perl, PHP, BASH, Lisp, Maple, Matlab, and more. While doing so I’ve also made use of other computer languages that are not quite programming languages, but still involved telling a computer what you mean like SQL, HTML, CSS, XML & JSON. The point I really want to drive home is that you are not a Java programmer, or a PHP programmer, or a Perl programmer – you are a programmer! The tool you happen to use most today is unlikely to be the one you use most a decade from now. 15 years ago I did 90% of my programming in Java, 10 years ago, PHP, today, Perl, next year, who knows!
In case you hadn’t guessed yet, I’m not going to pick a single computer language for this series of tutorials. I’m very deliberately going to make use of a palette of languages, and I’m going to focus on the underlying principles, rather than the specific peculiarities of any given language.
In order to help bring everyone along, I’m also not going to go from zero to real programming in one go. The plan is to sneak up on programming in small steps – hence the title of the series. We will be using computer languages from the start, but initially, they won’t be programming languages. Also, in order to be as inclusive as possible, I’m going to avoid vendor-specific languages – that means no Apple Script, no VB Script, no Objective C, and no C# (pronounced ‘see-sharp’ BTW). Instead, I’m going to use the most universal platform of all – the world wide web. We’re going to sneak up on programming by learning to create web pages.
Matching Podcast Episode 407
Listen along to this instalment on episode 407 of the Chit Chat Across the Pond Podcast
You can also Download the MP3
In this instalment all we’re going to do is get our tools in order. Like any good mechanic will tell you, everything is much easier when you have your tools in order before you start the job!
To that end, we’re going to install two vitally important pieces of software, a text editor suitable for programming, and web server app.
Choosing a Programming Editor
From a technological point of view, the only requirement for a text editor for programming with is that it can save files as plain-text.
You can’t use a word processor to write code – the output must be pure, unformatted, text.
That means that Mac users can use the built-in TextEdit app (assuming they put it into Plain-Text mode by selecting Make Plain Text in the Format menu).
Similarly, Windows users can use the standard Notepad app.
While you CAN use these basic editors, you really don’t want to – they will make your life needlessly difficult! What you really want is a text editor that understands the computer language you are writing in, so it can help you by doing things like highlighting invalid syntax, colour-coding valid syntax, automatically managing code indentation, and even auto-completing some code elements for you. You can use any programming editor you like, but the one I will be using in my screenshots is Atom, which is free, open source, and cross-platform.
Choosing a Web Server App
Initially, we are going to need very little from the web server we install, but as the series goes on, we’ll start to place more and more demands on it. So, to save ourselves having to change servers mid-series, I suggest instilling a full-featured product like MAMP, XAMPP or WAMP.
I’ll be using the free version of MAMP. MAMP comes with the various servers needed for a web stack, and with an app for controlling them.
It’s this controller app that you’ll be using to manage the server apps.
On the Mac the controller apps is called MAMP, and you’ll find it in the MAMP folder in the Applications folder.
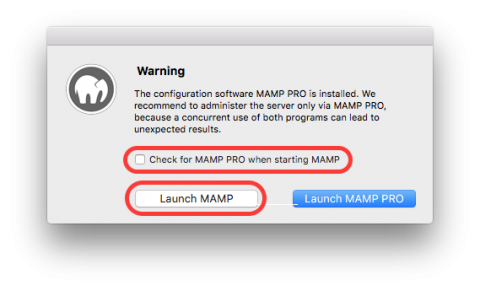
When you first launch MAMP it will try to strong-arm you into using MAMP Pro, don’t give in! My advice is to uncheck the checkbox to check for MAMP Pro, and then click the Launch MAMP button.
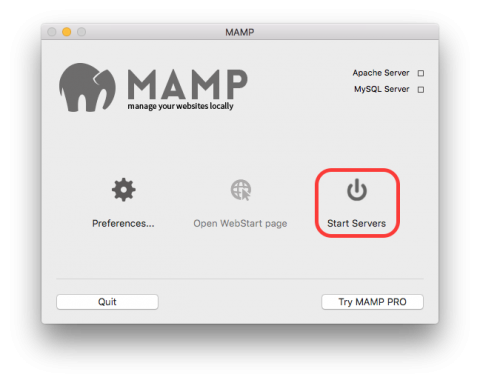
This is what the current version of the MAMP controller app looks like when it launches:
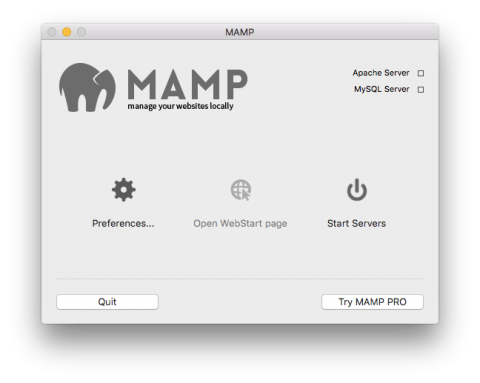
The little icons in the top right corner show whether or not the web and DB servers are running.
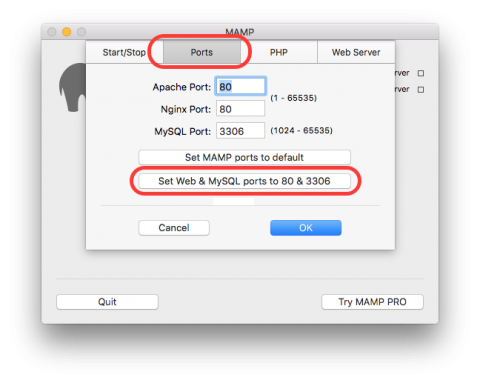
I like to reconfigure MAMP to use the industry standard ports for the web and DB servers (80 and 3306).
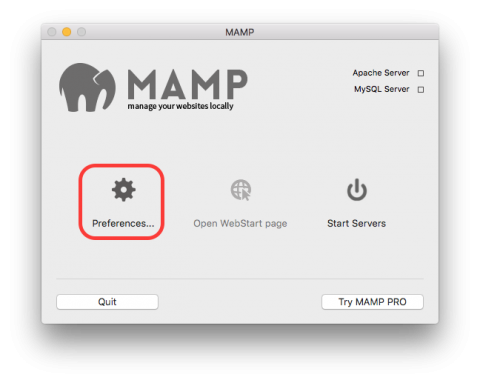
You do this by clicking Preferences, then selecting the Ports tab, and then clicking on the button Set Web & MySQL ports to 80 & 3306.
Any of the web server packages mentioned will map a given folder on your hard drive to the URL http://localhost/.
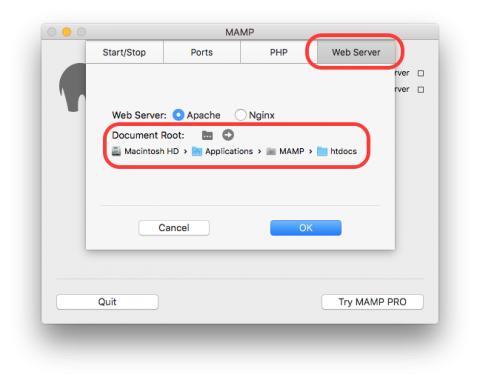
In MAMP you can see which folder is in use by going to the Web Server tab in the Preferences window.
On the Mac the default is Macintosh HD:Applications:MAMP:htdocs. The documentation for the other products will tell you where their so-called Document Root is located.
You are now ready to start your web server by clicking the Start Servers button.
Note that if you’ve edited your server to use port 80, you’ll be asked for your admin password each time you start and stop your servers.
Hello World!
To make sure everything has been installed OK, let’s create a simple Hello World! page.
First, create a folder called pbs1 in the document root of your chosen web server app.
Then, using your programming editor of choice, create a file called index.html and save it into this folder.
Add the following content to the file:
<!DOCTYPE html>
<html>
<head>
  <meta charset="UTF-8" />
  <title>Hello World!</title>
</head>
<body>
<h1>Hello World!</h1>
</body>
</html>
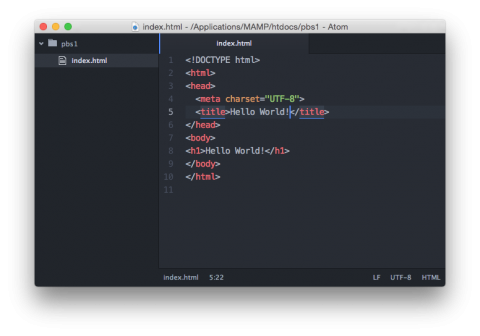
This is a screenshot of the file in my editor of choice, Atom:
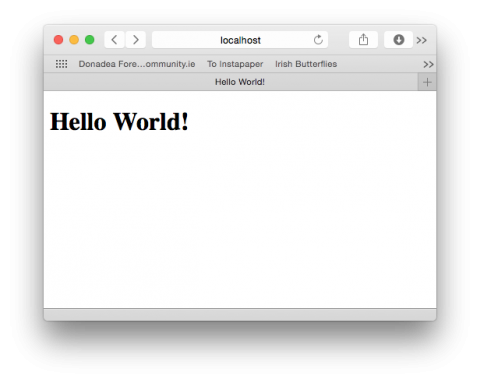
Assuming your server is running, you should be able to view the little web page we just created by browsing to the URL http://localhost/pbs1/ in your favourite browser.
Note that if you’ve not configured your web server to use port 80, you’ll need to specify the port number in the URL. For example, if you used the default port used by MAMP (8888), the URL would be: http://localhost:8888/pbs1/.
Final Thoughts
We’ve now laid the ground work to start on our journey towards programming. In the next instalment we’ll start learning about the Hyper Text Markup Language, or HTML, which instructs a web browser on how to present information to users. This is not a programming language as such, but a markup language. HTML will serve as a gentle introduction to the idea of using formally defined rules of grammar to tell a computer what we mean.
