PBS Tidbit 9 of Y: Using Git on iOS
For a long time, I assumed iOS couldn’t provide a good Git experience because of its security-first design. In iOS, your data is protected from unauthorised access because each app lives in its own little playpen (or sandbox to use the correct jargon). That appears to rule out the traditional approach I use on my Macs where I have a Git client for interacting with my repositories, and I make my edits in whichever one of my many editing apps I find most appropriate to the type of file I need to edit.
As I understood it, the only hope for Git on iOS would be to find a single app that was both a Git client and a really good editor for every single type of file I wanted to edit. This hypothetical all-in-one app would have no problem with iOS’s sandboxing because everything would live within that one app’s playpen. But what are the chances of finding such a unicorn app‽
In the early days of iOS what I described above was true, but iOS has moved on, and while Apple still make it possible to treat iOS as if it has no file system at all, Apple do now let you create and manage files and folder in your local device through the built-in Files app.
But, Apple didn’t just make it possible for you to manage files, they also provided APIs for developers to give their apps the power to reach outside of their sandboxes, but only in a very controlled way. The only way any app gets out of its sandbox is by you, the user, explicitly opening the file or folder on behalf of the app, without your interaction, the app is trapped. This lets iOS retain its strong security posture while also letting multiple apps access the same files and folders.
This is where NosillaCastaway Jill of Kent comes into the picture, while we were publishing our long series within a series on Git, Jill shared some feedback that she was playing along on her iPad, and that literally blew my mind! Based on Jill’s recommendation I installed the same iOS Git client she was using, and I’ve been happily Gitting on my iPhone and iPad ever since!
Matching Podcast Episode
You can also Download the MP3
Read an unedited, auto-generated transcript with chapter marks: PBS_2024_10_10
How it Works Conceptually
Regardless of which iOS Git app and which iOS editors you choose to use, conceptually, you’ll be working in the same way:
- Create a local folder on your iOS device using the Files app
- Use a Git app to convert that folder into a local Git repository and optionally connect it to a remote Git server
- Use any editing app that supports iOS’s local file access APIs to edit the files in the local Git repository.
A Walk-Through Using My Apps of Choice
Prerequisites
- A copy of Working Copy installed on your iOS device, and successfully connected to a Git server. I’ll be using GitHub over SSH. Note that Working Copy requires the $14.99 Pro version to link to external repositories.
- One or more text editors with the ability to open folders from the Files app. For example, I like to use Textastic to edit Markdown files.
Initial Setup of a Repo
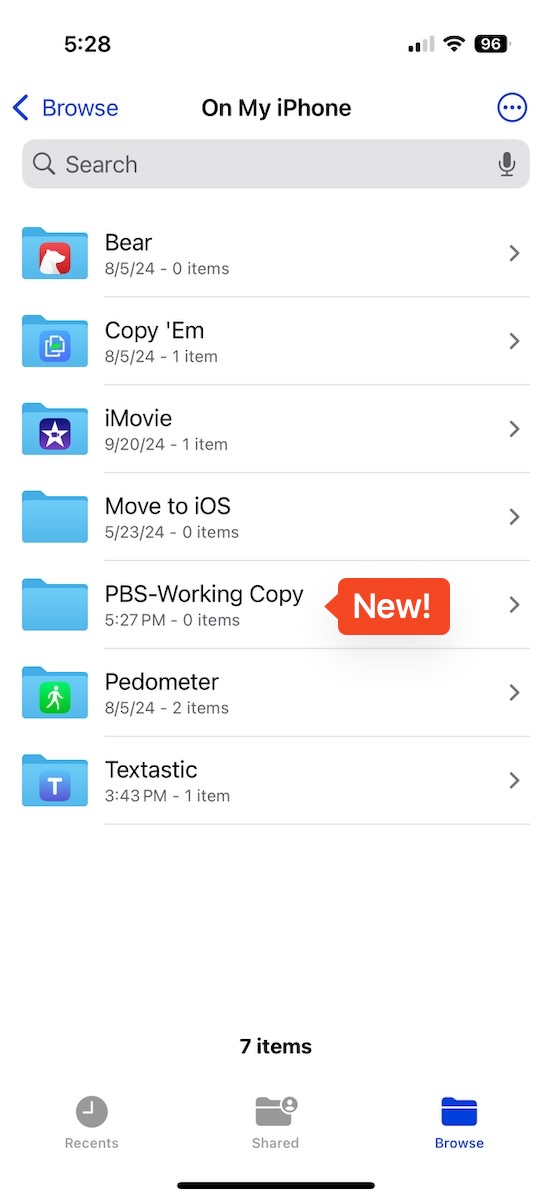
Step 1 — Create a Local Folder
Open the Files app, and navigate to the ‘on my iPhone/iPad’ top-level section.
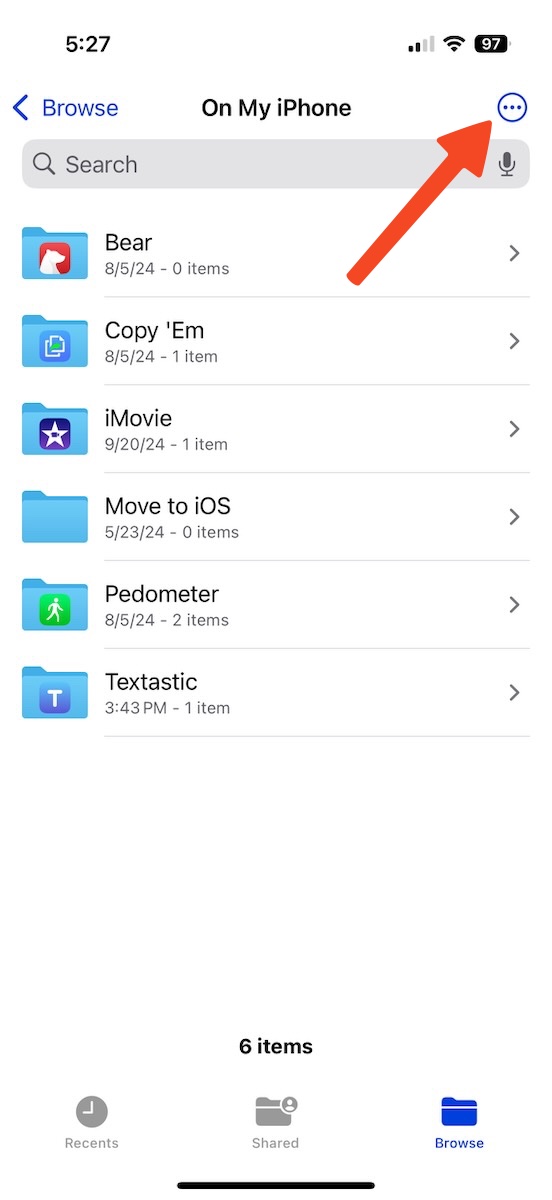
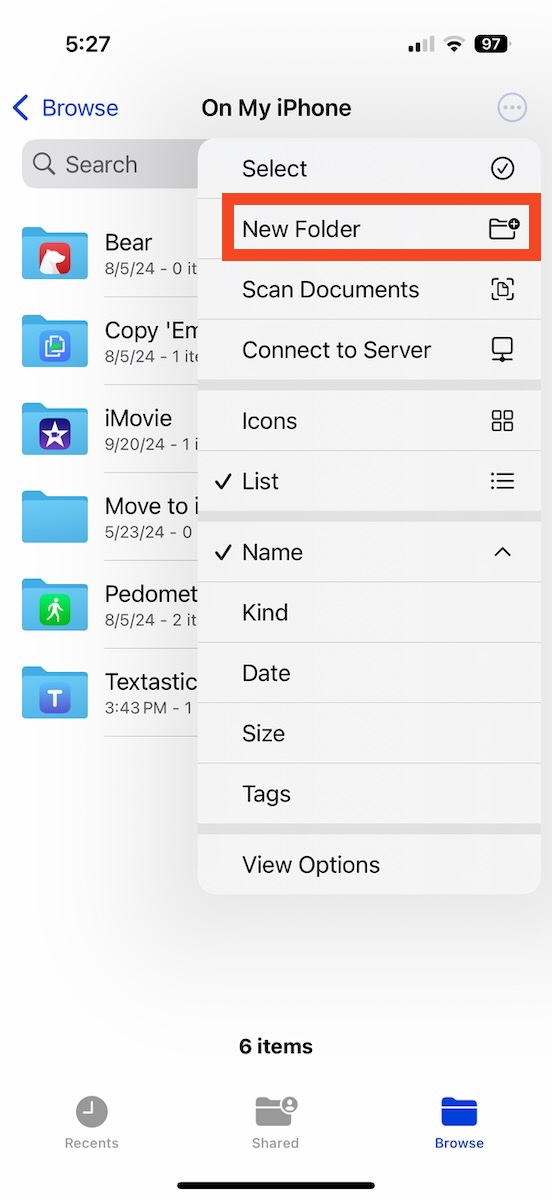
Click the three dots icon and then ‘new folder’.
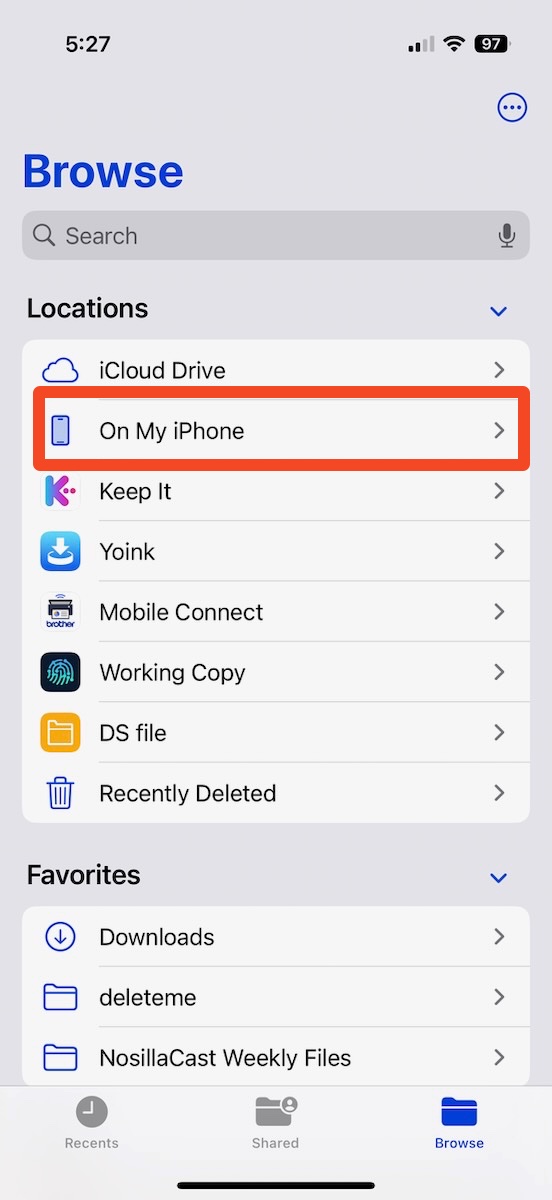
& Choose On my iPhone (or iPad)
Step 2 — Configure the Folder as a Git Repo
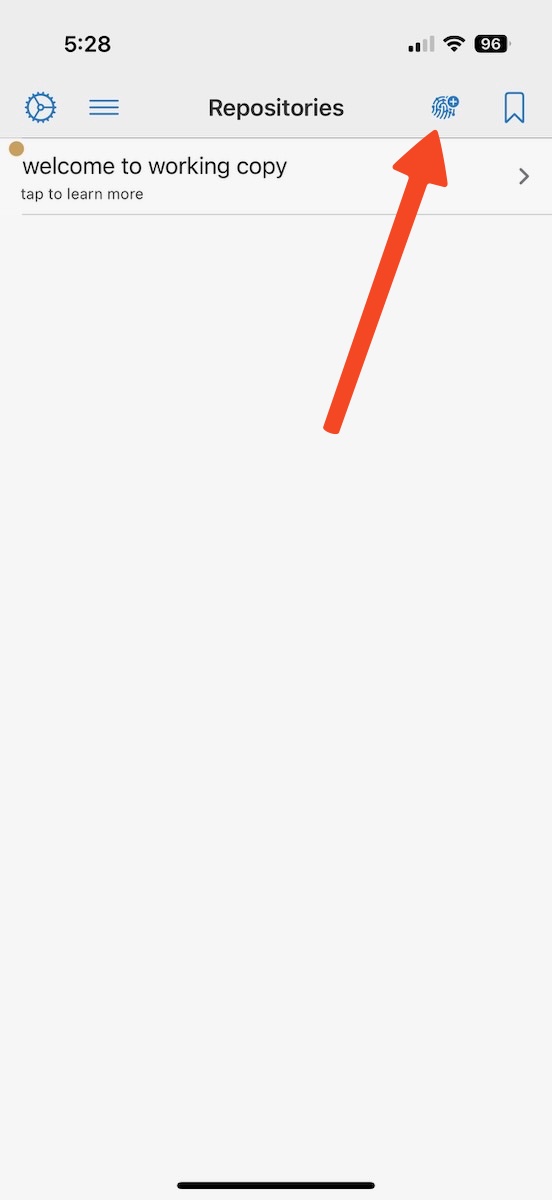
Open Working Copy, and at the top level page that lists all your repos, click the button that looks like a plus symbol on top of a fingerprint, select ‘Link external directory’ and then ‘Directory’ from the dropdown to connect to the folder you just created in the Files app.
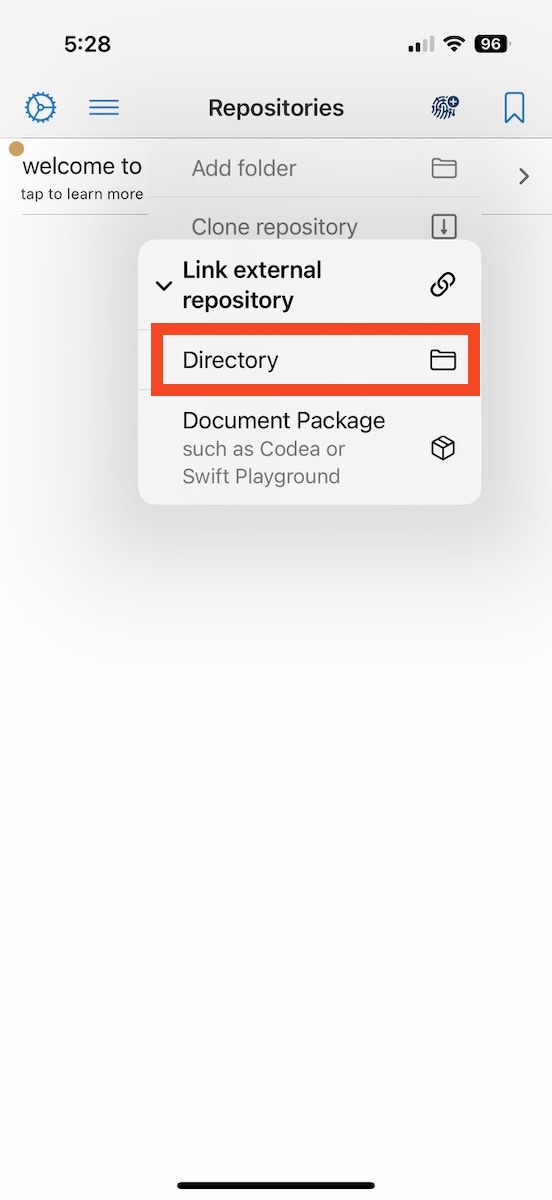
Select Directory
Do NOT Select Clone Repo

You now have an empty local Git repo with no commits. To use your Git server, you need to add a remote to this local repo.
Step 3 — Add a Remote to the Local Repo
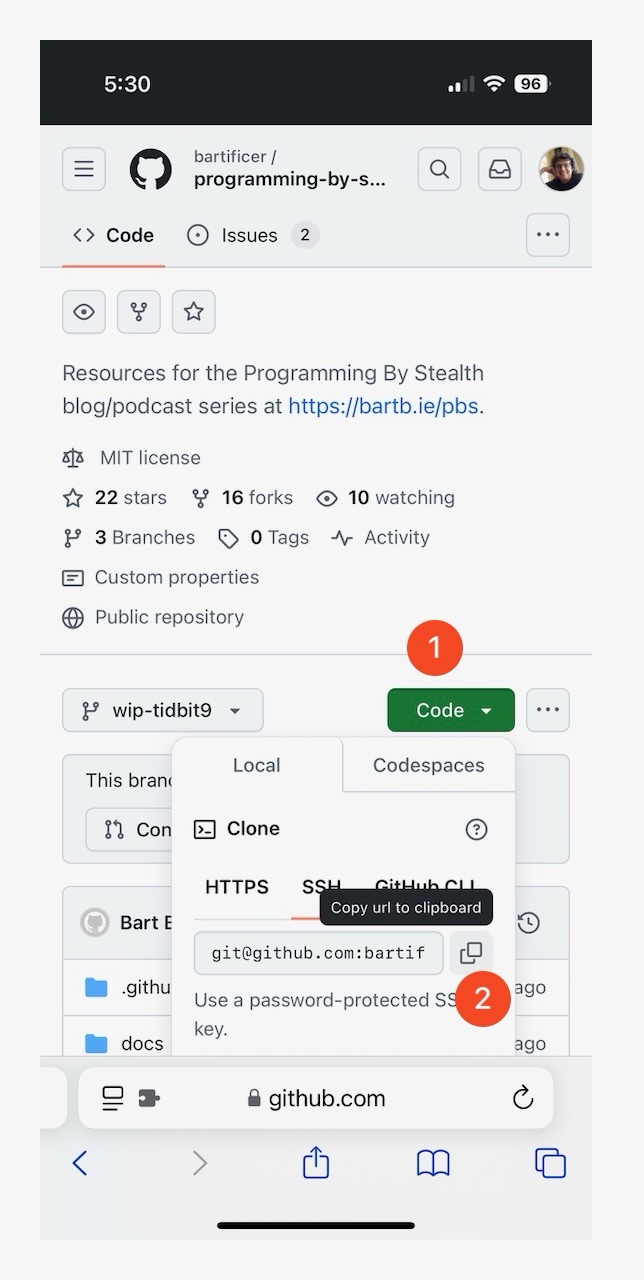
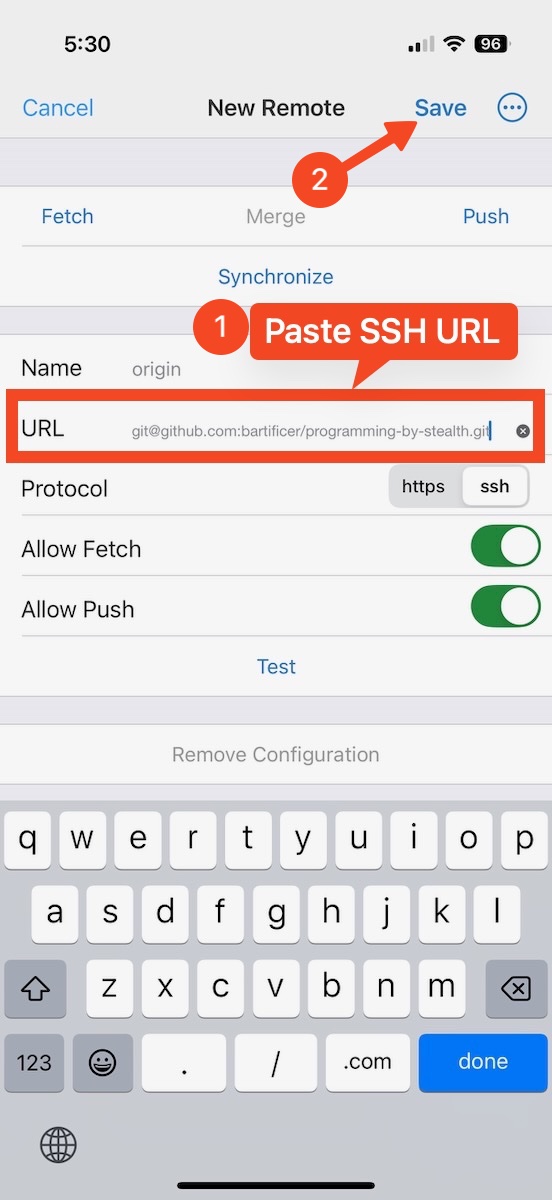
Before you go any further, you’ll need to fetch the URL for your desired repo on your Git server. For fellow GitHub users, note that you’ll need to use the web interface, because I have not found a way of getting the GitHub iOS app to show the SSH URL for a repo!
In Working Copy, go into the new linked shared folder and click the word ‘Repository’ (not the icon to the right):
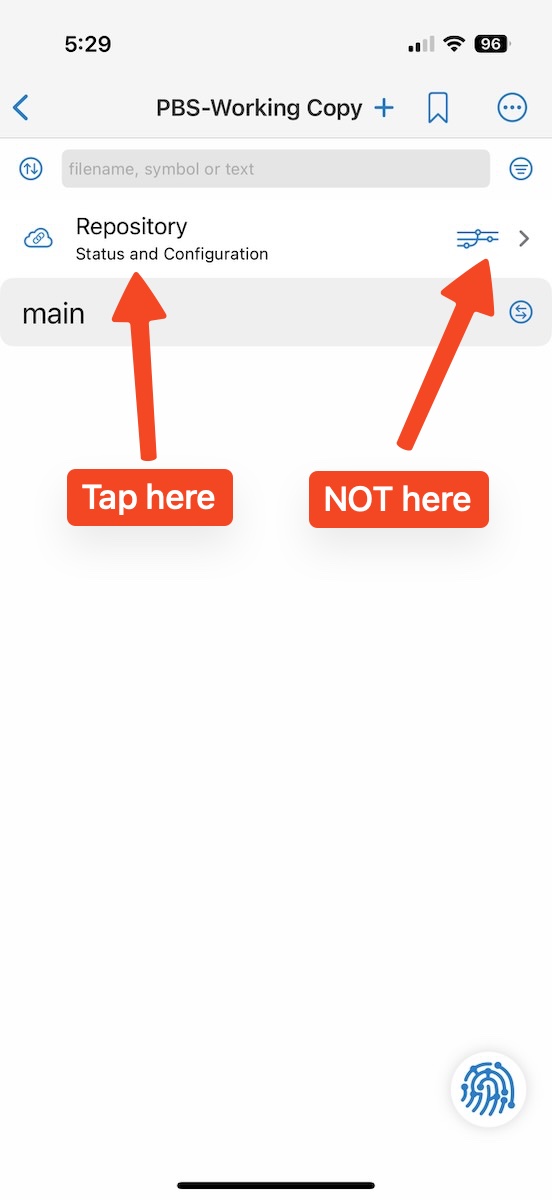
NOT Icons on Right
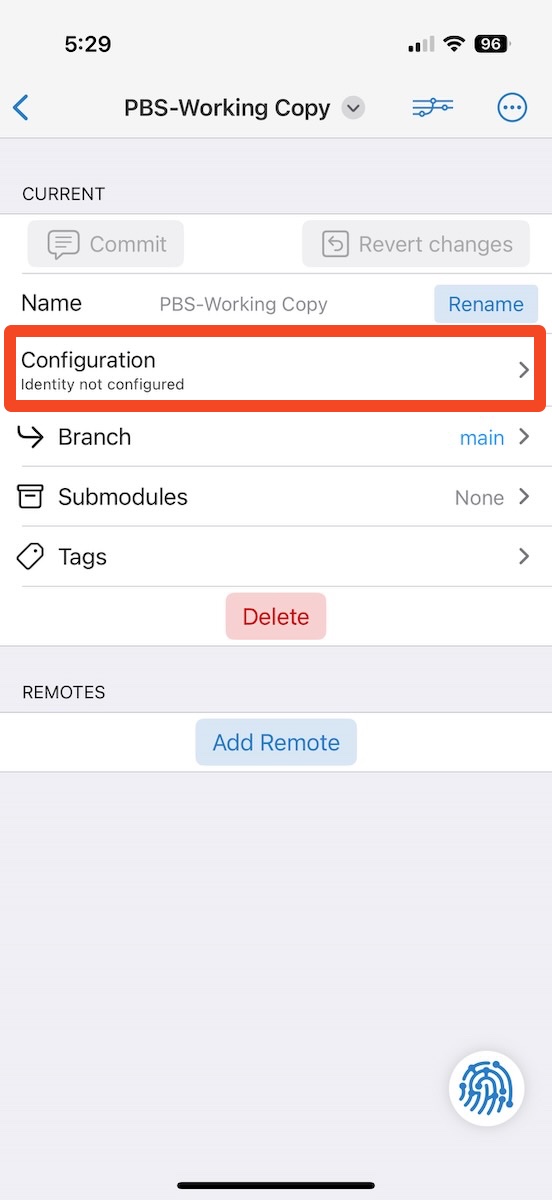
On the repository setting page, click the ‘Configuration’ button:
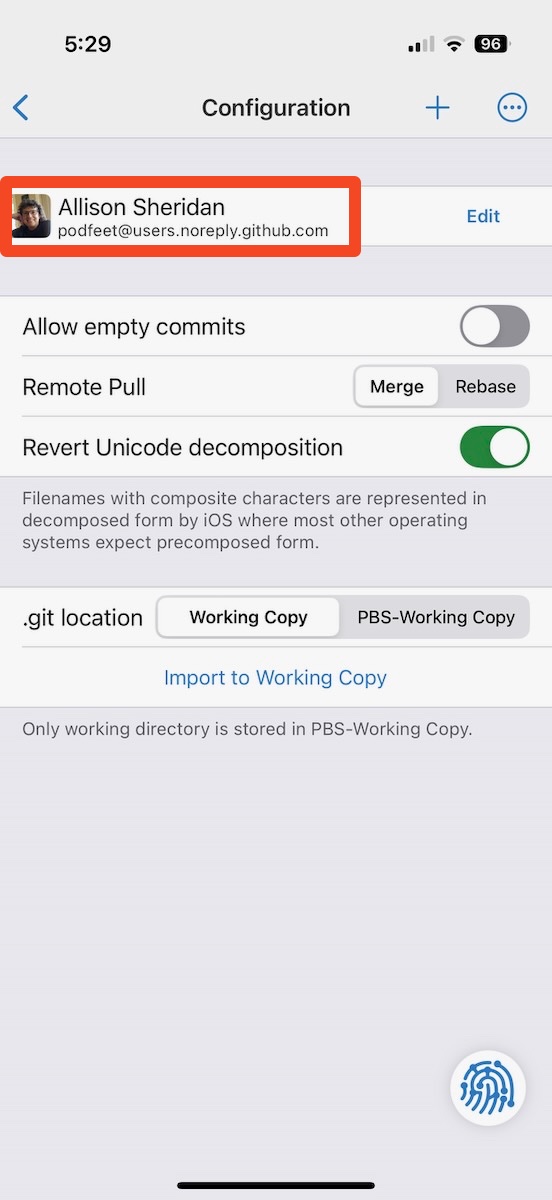
You’ll see one or more Git identities in a list that doesn’t look like a list at the top of the page — select the identity you set up in Working Copy that’s connected to your server. For me, that’s my GitHub account. When you have an identity ticked, back out to the repository settings page again.
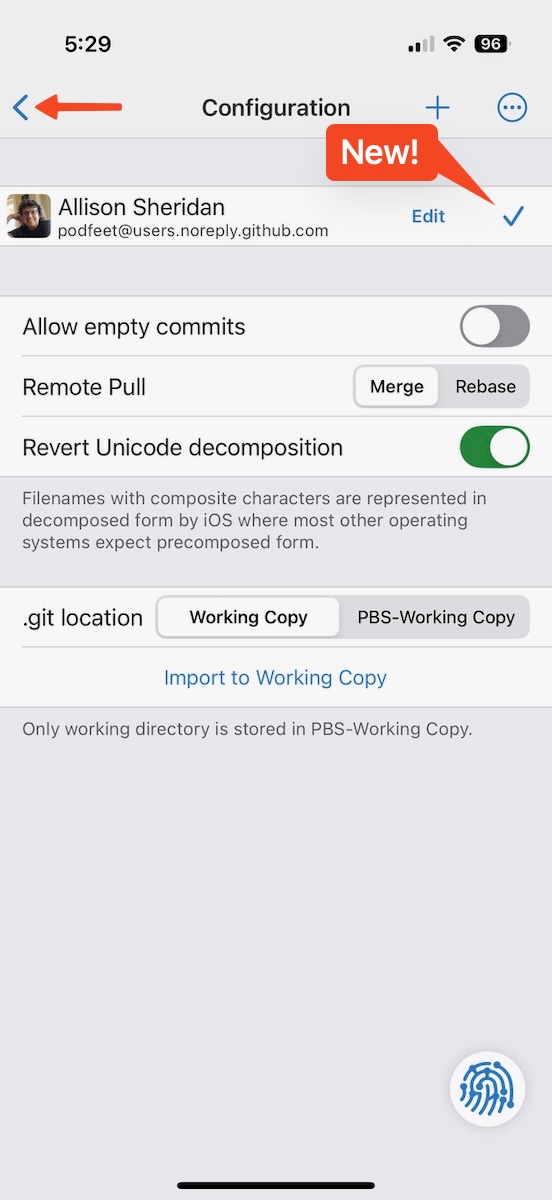
You Should See a Checkmark
Tap Back Chevron
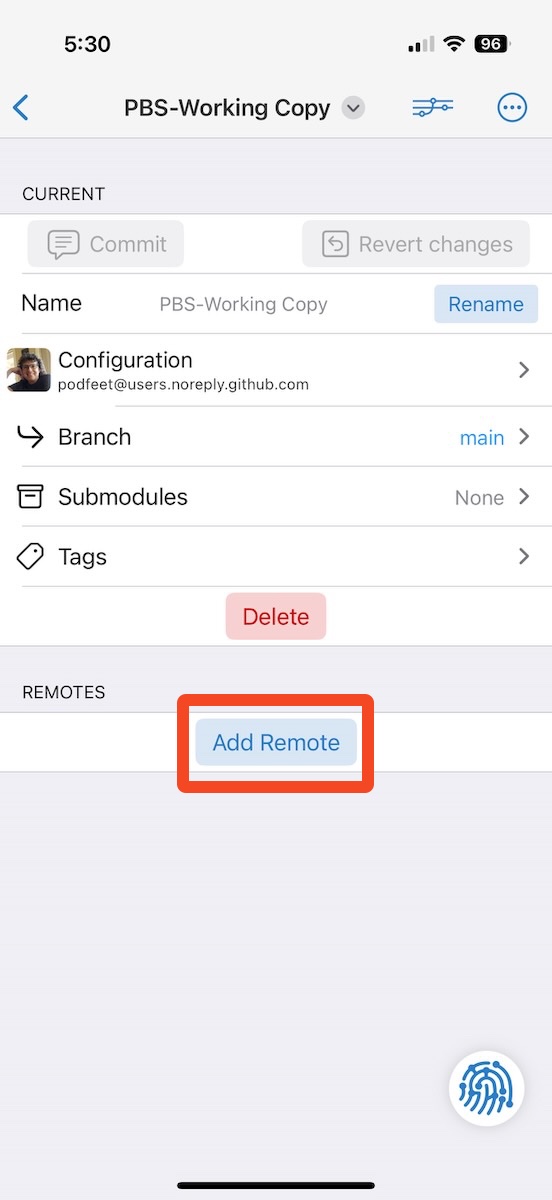
Now that Working Copy knows which authentication details to use, you’re ready to link your local repo to the appropriate repo on your server.
Click the button to add a remote and paste in the URL you fetched earlier.
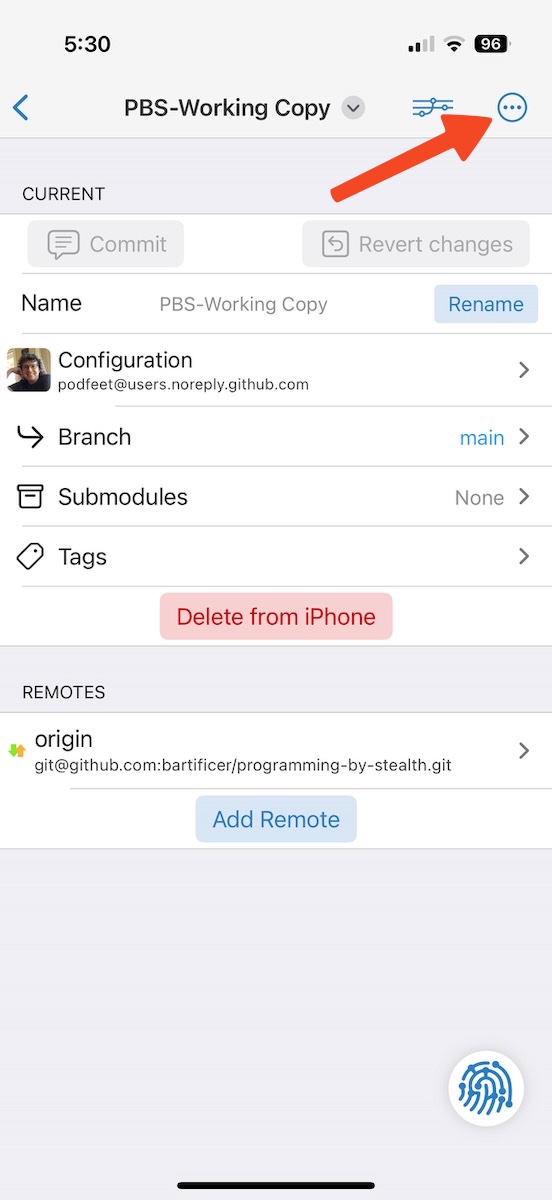
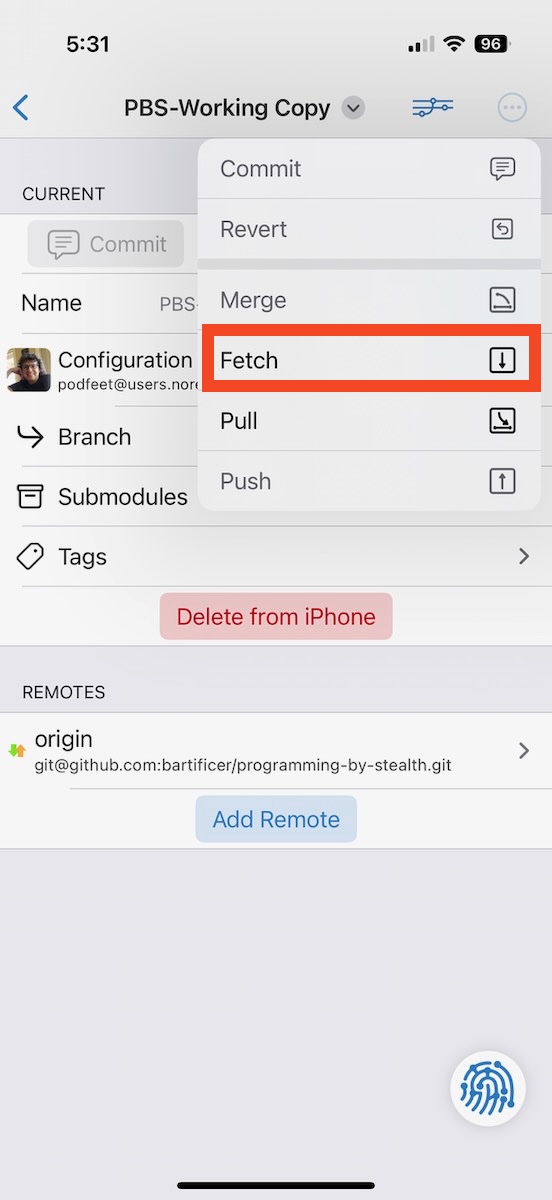
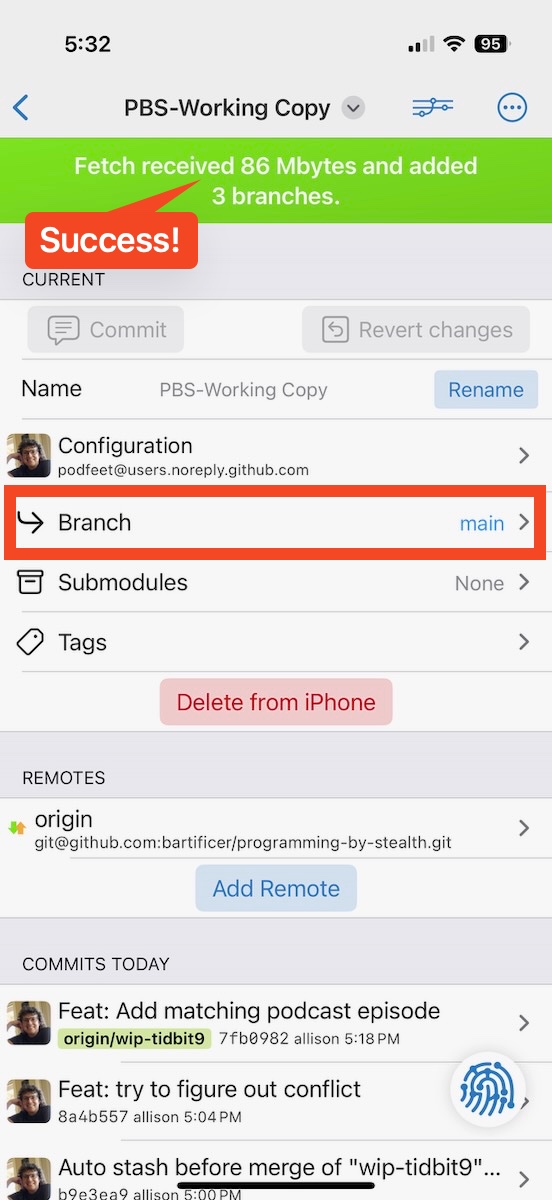
Back on the repository setting page, click the three dots and choose ‘fetch’, which should retrieve the list of remote branches:
Note that you can’t yet pull because the branch you have checked out is your local main branch which has no commits yet so it is unborn. Pushing and pulling is only possible when you have local branches linked to remote branches. So, that’s what we need to arrange next.
Note that what the interface now shows you is all the branches that exist both locally and remotely, with the local branches on top (there will be just main), and the remote branches below.
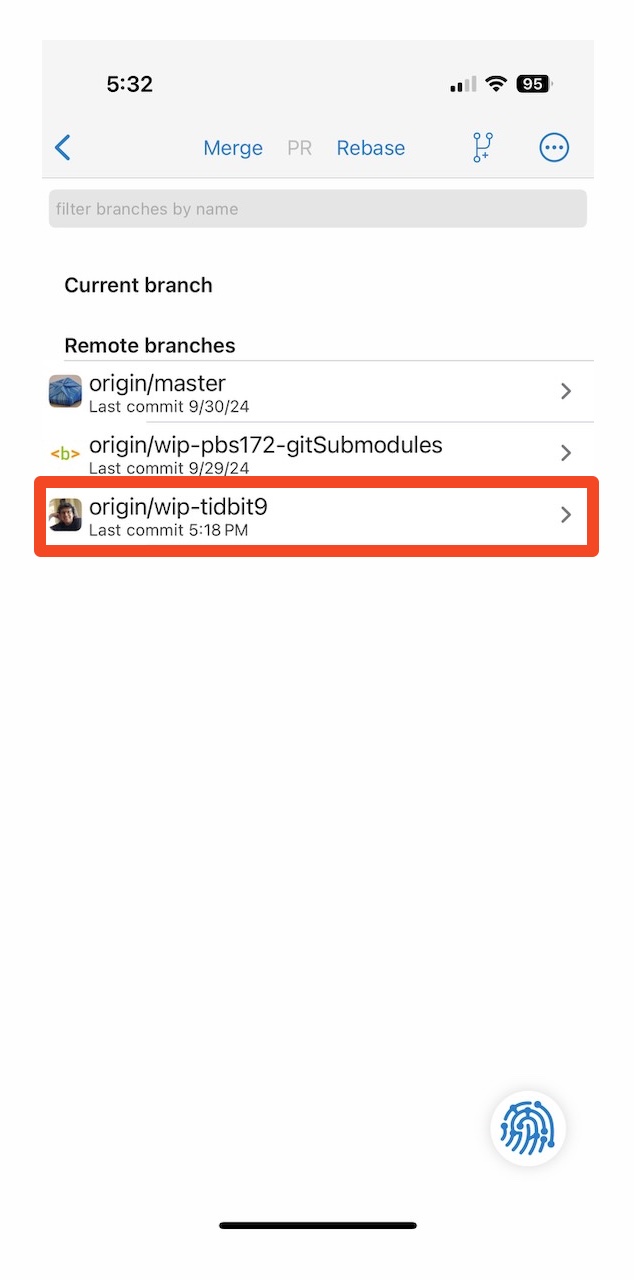
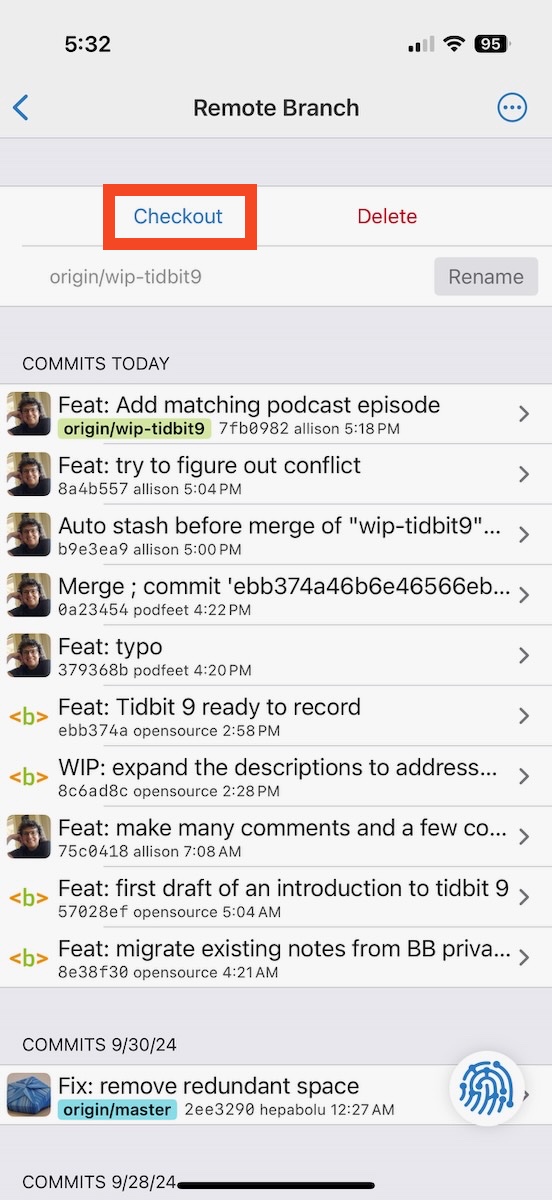
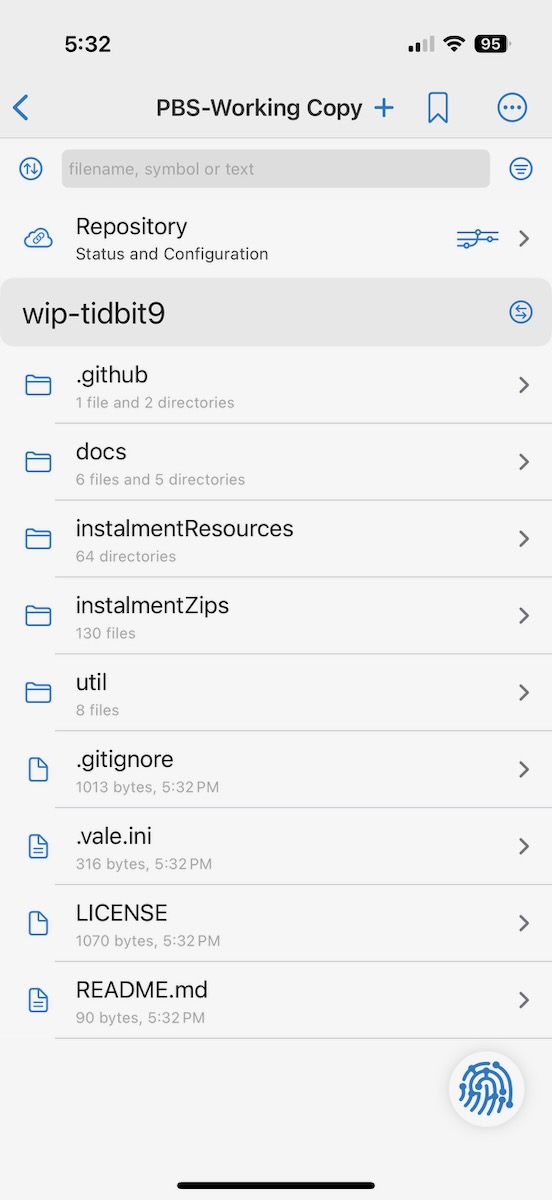
To start using files from the remote repository you need to check out a remote branch. It doesn’t matter which one you check out, but you need to check at least one out (no reason you can’t check out more later). Once you check out a remote branch you will see a copy of it above the divider as a local branch, and it will be linked to the remote branch you checked. Now that you have a local branch connected to a remote branch you can push and pull changes to and from the remote repository.

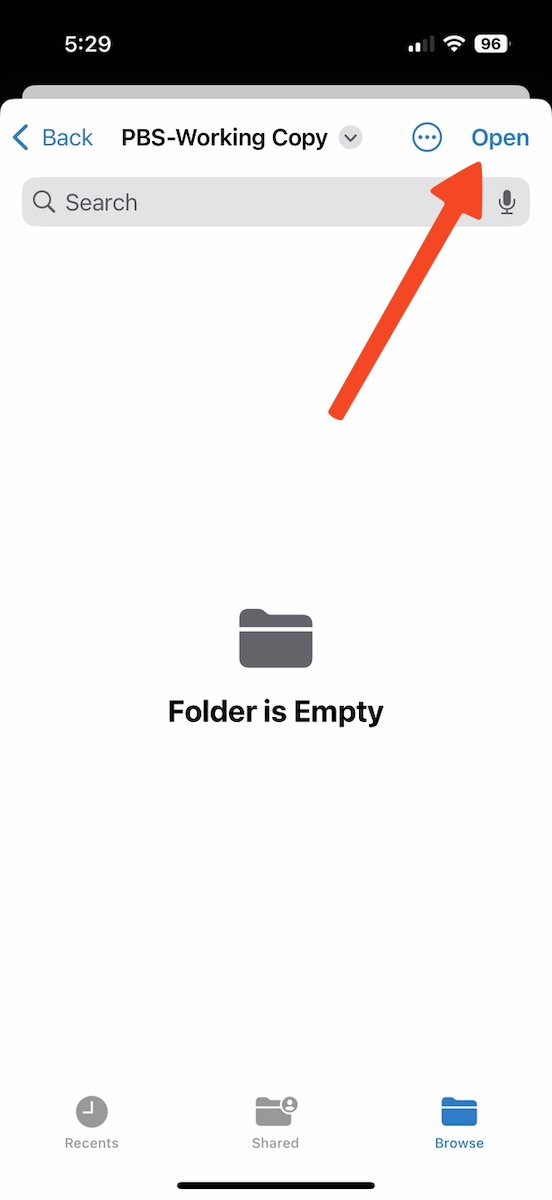
by Opening the Folder
Step 4 —Textastic
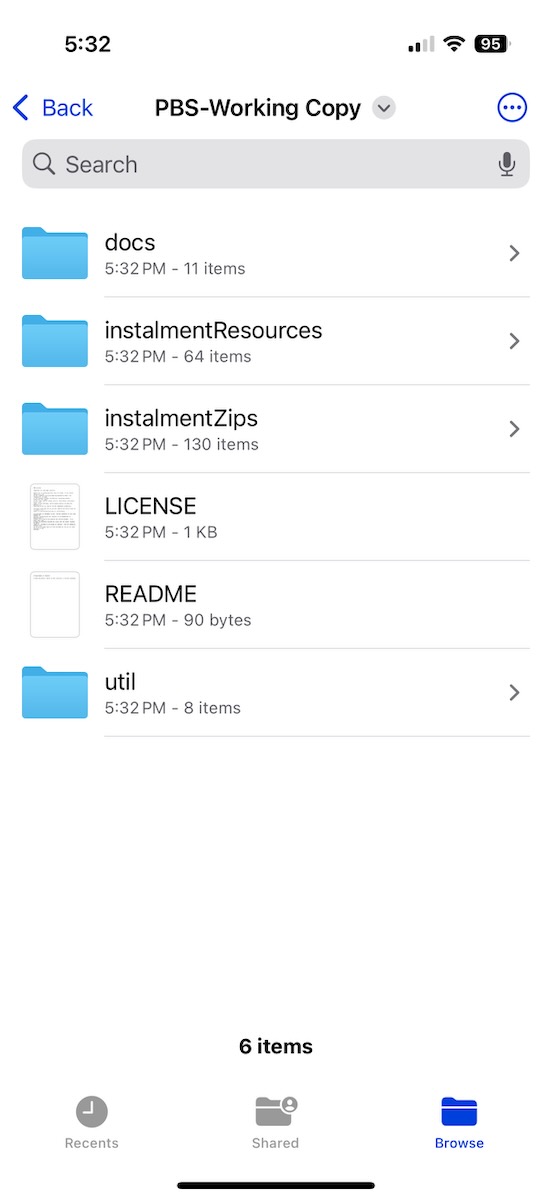
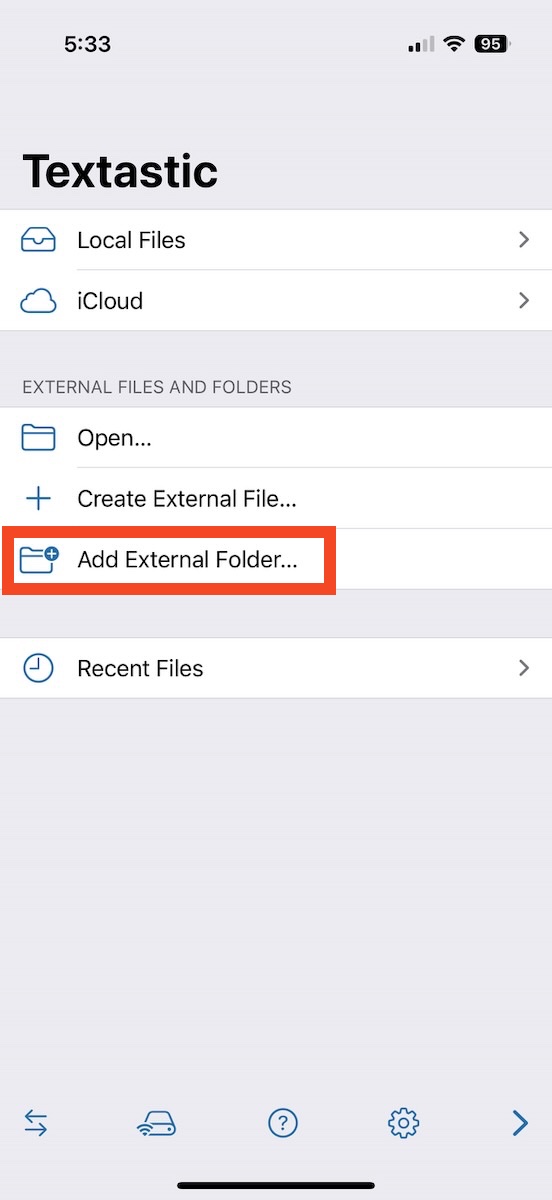
Open Textastic and choose Add External Folder… Then navigate through the Files app to On My iPhone and select the repo folder.
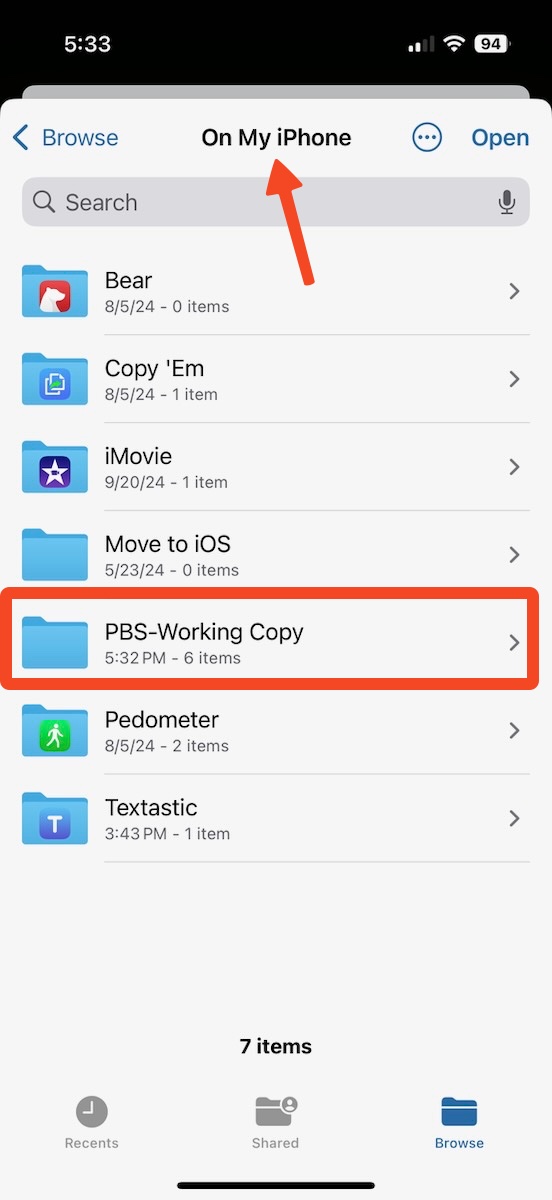
& Select Repo Folder
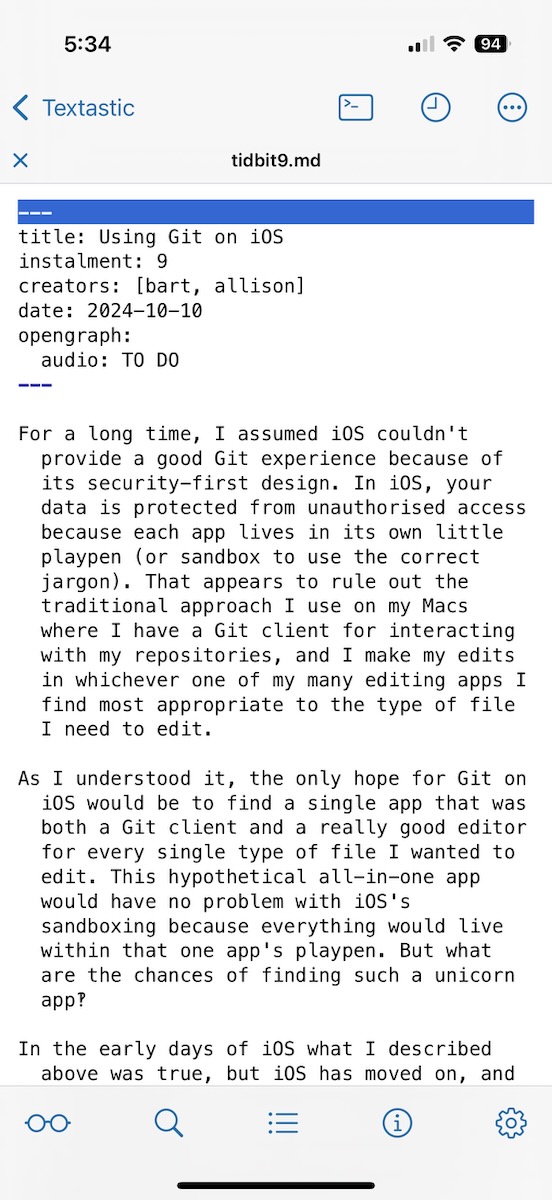
and Go to Town in Textastic
Day-to-Day Use
- Check out the desired branch in Working Copy
- Open the folder in your text editor of choice and make your edits
- Use Working Copy to commit, push, pull etc.
Final Thoughts
Regardless of whether or not you end up choosing the same apps I did, if you’re an iPhone and/or iPad user, I hope I’ve armed you with enough information and inspiration to start experimenting with Git on iOS.