PBS Tidbit 17 of Y: Simplifying Developer Setups with Docker
Note: this tidbit is guest-written by Helma van der Linden, and the matching podcast episodes are guest-hosted by Bart, temporarily taking Allison’s role as the ‘student’.
While listening to the episodes PBS 177 through 181 I realised I use a different approach to isolate programming environments, one that I increasingly embrace.
Matching Podcast Episode
The audio for this bumper-sized tidbit is spread across two podcast episodes:
PBS Tidbit 17a:
You can also Download the MP3
Read an unedited, auto-generated transcript with chapter marks: PBS_2026_01_27
PBS Tidbit 17b:
Picks up at the heading entitled Reusing the Docker image.
You can also Download the MP3
Read an unedited, auto-generated transcript with chapter marks: PBS_2026_01_31
Downloads to Play Along
During the instructions from Helma, you’ll be using the Jekyll Demo Site that Bart created for PBS 178. When Helma says to install into the directory, you’ll need to have downloaded the demo site to follow along. You can download it from Bart’s GitHub repo: github.com/bartificer…
Problem to Be Solved: Dependency Chaos
As a developer, you’ve probably faced this: you want to install a tool like Jekyll, and it needs Ruby, Bundler, and specific libraries. You install them, only to realize another project needs a different Ruby version. Things start to break.
Welcome to dependency hell. Dependency hell is the term coined for the situation where different projects need different versions of the same library or package, but since the package is installed globally on your machine, you can have only one version of that package.
Another Problem to Be Solved: Outdated setup
Recently, Allison and Bart created a new episode for Taming the Terminal. The previous one was several years ago, so the scripts to build the various formats of the book didn’t work any more because the packages were outdated and required an older version of Ruby than the one currently installed. Of course, we can update everything and make the build system go again, but if Allison or Bart would like to build the book themselves, they would have to go through all the upgrade steps that were done to get the build system up and running again. Also, what if there is a small utility present on my machine that Allison and Bart don’t have installed? The build would run smoothly on my machine, while it breaks on theirs. The old ‘it works because it runs on my machine’ syndrome.
The Concepts
You can escape these nightmares if you isolate each project’s environment.
There are three ways to create such an isolation:
- virtual environments
- virtual machines
- Docker
Let’s have a look at each of these solutions.
Virtual Environments
Using virtual environments is a lightweight way to isolate dependencies for different projects. They allow developers to avoid version conflicts without needing system-wide installations. So it’s the first step in solving the dependency hell problem.
A virtual environment tries to contain all project dependencies to the project directory where the project lives. Dependencies are the specific versions of the programming language and libraries or modules that need to be installed in order for the app to work.
Different languages, such as Ruby, Python, and Node, each have their own solution to virtual environments, such as venv for Python and nvm for Node.
Let’s look at the example Bart and Allison discussed some time ago when they installed Jekyll on their local machines:
Ruby Virtual Environment Example (with chruby + ruby-install + bundler)
Allison and Bart used these tools to create the virtual environment:
chruby– Lightweight Ruby version switcher.ruby-install– Installs Ruby versions (used withchruby).bundler– Manages gem dependencies per project.
This is not a repeat of the installation instructions, but merely a summary of the steps involved:
- Install
chrubyandruby-install - Add the config files to the shell config (
~/.zshrcor~/.bashrc) - Then reload the shell
- Install a Ruby Version with
ruby-install - After all this is installed, install Jekyll and other dependencies using
bundle install
This setup contains the Ruby version and the necessary gem files to just this directory. In another Ruby project there is no knowledge of these dependencies.
Benefits of Using Virtual Environments
What are the benefits of Virtual environments?
- Dependency Isolation
- Prevents version conflicts between projects.
- Each project can use its own versions of libraries or packages.
- No Global Pollution
- Avoids installing packages globally, keeping your system clean. The project only gets the packages it needs in the versions it needs.
- Easier Collaboration
- Ensures reproducibility. Others can recreate the same environment using a dependency definition file, such as a
requirements.txtfor a Python project, aGemfilefor a Ruby project, and of course, apackage.jsonfor a Node or JavaScript project.
- Ensures reproducibility. Others can recreate the same environment using a dependency definition file, such as a
- Safe Experimentation
- Try out new packages or versions without affecting existing setups.
- Fast Setup
- A virtual environment is typically faster than any of the other solutions, such as spinning up a Docker container or a Virtual Machine.
Downsides of Virtual Environments
There are also downsides to virtual environments.
-
Still Depends on Host Environment
- It doesn’t isolate system-level dependencies (e.g., binary tools, compilers).
For example, even when using
chrubyto select the correct Ruby version for Jekyll, Jekyll still relies on system tools likegitandcurl. If they are not installed on the host system, commands such asbundle installor fetching theme dependencies can fail, even though the Ruby environment is set up correctly. - Still prone to conflicts with global PATH or language engines.
For example, if your system has a globally installed Jekyll from an older Ruby version earlier in your
PATH, runningjekyll servemay invoke the wrong executable instead of the one provided by your currentchruby-selected Ruby, leading to confusing version and/or dependency errors. - When you use multiple virtual environments (for multiple programming languages), your
.bashrcor.zshrcbecomes very large. This can result in a noticeable delay between opening a terminal window and the prompt showing up.
- It doesn’t isolate system-level dependencies (e.g., binary tools, compilers).
For example, even when using
-
Not Truly Cross-Platform
- Environments might behave differently on Windows vs macOS vs Linux.
-
Harder to Clean Up System-wide Dependencies
- While project dependencies are isolated, the underlying language runtime (Ruby or Python) still comes from the host system. Note that all the versions of the interpreter (Ruby, Python, or Node.js) are still installed globally on your system; the virtual environments simply make one version active and hide the others for that specific environment.
- You also have to be very diligent about maintaining the virtual environment of each project and create one for each new project. When you copy and paste a command from a Google or some AI tool session, you might accidentally install the package or tool in the global or system-wide configuration.
-
Limited to Language-Specific Dependencies
- You can’t isolate other components you need, such as PostgreSQL, Redis, NGINX, etc., as Docker or a Virtual Machine can.
Most Used Virtual Environments by Language
| Language | Common Virtual Env Tools | Notes |
|---|---|---|
| Python | venv, virtualenv, pipenv, poetry |
venv is built-in since Python 3.3; poetry is popular for full project management. |
| Node.js | nvm (Node Version Manager), volta |
Manage Node versions per project. nvm + npm install per project isolates deps. |
| Ruby | rbenv, rvm, chruby + Bundler |
rbenv + bundler is common. Gemfile defines project deps. |
| PHP | phpenv, composer |
composer handles package isolation. phpenv manages PHP versions. |
| Elixir | asdf (manages versions), Mix (for deps) |
asdf can manage Elixir + Erlang versions together. |
| JavaScript (frontend) | npm, yarn, pnpm workspaces |
Lockfiles and node_modules isolate dependencies per project. |
You need to repeat similar steps for each programming language you need, and the step of installing the local environment for every project.
For simple projects or projects that stick to one programming language, a virtual environment might be sufficient.
Virtual Machines (VMs)
At the other end of the spectrum of project environment isolation is the Virtual Machine or VM. A VM lets you emulate a full operating system (OS) inside your host computer. It’s like having an extra computer within your computer. This can even be a different OS than your main computer. For example, if you need to run a Windows-only application on your Mac, you typically use a VM to install Windows so you can install the Windows-only application.
Popular VM Software for Developers
- Parallels Desktop: Commercial, highly optimised for macOS.
- VMware Fusion: Professional-grade VM software with broad OS support.
- VirtualBox: Free and open-source; less optimised but reliable.
- UTM: macOS-native VM solution for Apple Silicon.
With a VM, you get a clean environment that won’t interfere with your main system, but it also requires a lot of resources of your computer. The VM simulates a computer; therefore, it requires RAM and disk space, which are taken from the available RAM and disk space of your computer. If you allocate too little RAM to the VM, it will run slowly; if you allocate too much, other applications outside the VM will start to run slowly.
Plan for VMs when buying a computer
If you plan to use VMs, make sure your computer has plenty of RAM and disk space to accommodate the number of VMs you want to run simultaneously, and consider whether you want to perform other tasks on your computer while a VM is running.
Docker-Based Environments 🐳
Docker is a containerization platform–a tool that allows you to run software in isolated, lightweight environments called containers.
Think of a container like a mini virtual machine that:
- Has its own filesystem
- Runs its own services
- Contains all the dependencies and binaries it needs
- BUT shares the host system’s kernel (makes it faster and lighter)
A container doesn’t include a full OS (like a VM does). It just contains your app and exactly what your app needs to run – nothing more. So you cannot run Windows in a Docker container on a macOS computer.
Analogy
Let’s use a little analogy to compare the three types of environments, so the differences become more obvious.
Imagine you need to prepare a meal.
- A virtual environment is like cooking inside your kitchen, but keeping each recipe’s ingredients in separate, labelled containers. You rely entirely on the kitchen’s appliances and setup being compatible.
- A virtual machine is building a separate restaurant on its own land. Everything, building, utilities, appliances, is self-contained.
- A Docker container is a food truck. It brings its own stove, own utensils, and own ingredients. It only relies on your property for power, infrastructure such as water and sewers and a place to park.
So a Docker container sits in the middle of a light weight virtual environment and a fully separated VM.
Docker Lingo
When you dive into Docker, you quickly come across different terms like images, containers, and volumes. Let’s explain them so we can use Docker correctly.
A Docker image is a blueprint or template for a container. An image is read-only and versioned. It is built once and can be reused many times.
An image contains:
- A base OS layer (e.g. Alpine or Debian)
- System libraries
- Language runtime (Ruby, Node, Python, etc.)
- Your application code (optional)
- Instructions on how to start the app
In our analogy, a Docker image is a recipe or an empty food truck, ready for use.
Although you can perfectly build an image from scratch, chances are high that someone has already solved your problem and made the resulting image available online. Typically, these images can be found in Docker hub. You can use such an image as a base and add your own customisation to it. We won’t cover this in this episode, but it might be addressed in a future episode.
Without going too deep into the Docker image techniques for now, one term you might come across is Docker layer. A layer is a single instruction in the build of a Docker image. In our food analogy, if an image is a recipe, a layer is a step in that recipe.
A Docker container is a running instance of an image. docker start actually starts a container. In turn, this pulls in the image and executes the layers in the image. Containers are isolated from each other. So, back to our analogy, you can have two food trucks, both identical initially, but one makes French food, and the other makes Asian food, without even knowing about each other’s existence.
A container can be easily started, stopped, destroyed, and rebuilt again. This means that any data stored within a container can get lost very easily. That’s why we need volumes.
A Docker volume is a persistent storage location outside a container’s lifecycle. This is the place where your project files live.
Back to our analogy, a volume is the pantry where your ingredients are stored. If you keep your pantry separate but easily accessible from your food truck, you can replace or upgrade your food truck without losing the food.
How Are Containers Used?
Each project or tool you work with –Jekyll, Node.js, PostgreSQL– can run in its own isolated container. This means that you can have multiple versions of the same programming language or tool side by side, without conflicts. So project A uses Ruby 2.7, while project B uses Ruby 3.1. You can even run them side by side without clashes.
And, as long as the image and container persist, you could even build an old project with an outdated version, while you updated your computer in the meantime, and your system Ruby version went from 3.1 to 3.5.
By default, Docker containers have their own internal file system. But that’s not useful for development–you don’t want your code trapped inside a container. So Docker allows you to bind mount a folder from your Mac into the container. This is called volume binding.
Let’s say your project lives at:
/Users/you/projects/my-jekyll-site
When you run Docker, it will mount that folder into the container, like:
/container/workdir/my-jekyll-site
This allows you to edit the files locally in VS Code or any other preferred editor. The container sees the live updates and can act on them, while changes persist on your Mac, so they are not lost when the container stops.
Think of it like a Dropbox folder. You’re working on the file on your computer (which is called the host). Docker sees and uses the same file inside the container, and any changes sync in both directions, in real time.
You don’t lose work when the container is deleted. You can track everything in Git as normal, and you can use your favourite development tools outside Docker.
Summary of the Docker terms
| Concept | What It Is | Lifecycle | Purpose |
|---|---|---|---|
| Image | Blueprint | Long-lived | Defines environment |
| Container | Running instance | Short-lived | Executes application |
| Volume | Persistent storage | Independent | Stores data |
Final thoughts on the concepts
While Docker gives you a great isolated environment for your project, you might consider this too much work for the few projects you are involved in. That’s fine, and you can stick to a virtual environment.
However, when you work in a team on the same project, like Allison and Bart on PBS, you can share the Docker image and be assured that both use exactly the same setup and configurations. Odd errors and failures because not all team members are on exactly the same version of a tool are gone. And, if ever a Windows-based or Linux-based user wants to contribute, the Docker container can be created on their OS and provide the same environment.
A worked example
Now that we have the concepts clear, we can work on an actual example. The ultimate goal is to add a Docker-based build system to the PBS project, but let’s start with a smaller task, which is replacing the virtual environment in the demo Jekyll site of episodes 177 through 181 with a Docker-based system.
macOS doesn’t natively support Linux containers, so Docker needs a helper VM under the hood. The official tool is Docker Desktop, which is available at docs.docker.com/get-started/get-docker/. So let’s install it.
Once installed, start Docker Desktop, because it needs to run to be able to run the containers. You don’t need to set up an account and sign in. The extra features you get from signing in are not necessary if you just keep your Docker images locally.
You might even never need to look at the GUI, but sometimes it comes in handy.
The other tool we are going to need is make. This tool is a golden oldie. It was created in 1976 out of frustration, according to Wikipedia. It has become the default build automation tool so long ago that it’s part of your default macOS installation. To check it, open a terminal window and type
make
we will get an output like
make: *** No targets specified and no makefile found. Stop.
To bring the pieces together, we will use Docker to create a self-contained environment for the local test of the website and we will use make to execute the scripts necessary to work with the Docker environment.
Docker Setup
Dockerfile
As explained before, a Docker container is an instance of a Docker image, so the first thing to do is to build the image. The image is configured using a Dockerfile. To come back to our food prep analogy, the Dockerfile is the recipe to create an image or the blueprint to create a food truck.
Create a file named Dockerfile (it’s case sensitive) in the project root with the following content
# 1. Base this image on the official Docker image for Ruby
FROM ruby:3.3

# 2. Install Node.js (needed for some Jekyll plugins)
RUN curl -fsSL https://deb.nodesource.com/setup_20.x | bash - && \
    apt-get install -y nodejs && \
    rm -rf /var/lib/apt/lists/*

# 3. Set working directory to project root
WORKDIR /site

# 4. Copy Gemfile from docs directory
COPY docs/Gemfile* ./docs/

# 5. Install bundler and dependencies
WORKDIR /site/docs
RUN gem install bundler && \
    bundle install        # Gems installed at build time

# 6. Expose Jekyll's default port
EXPOSE 4000

# 7. Default command
CMD ["bundle", "exec", "jekyll", "serve", "--host", "0.0.0.0", "--livereload", "--force_polling"]
NOTE This file is called
Dockerfile(no extensions) by convention. You are welcome to rename it, but it requires you to specify this file in every invocation of Docker. So, the advice is to stick with convention.
In the previous part we briefly mentioned Docker layers. Here we see the layers in action. Basically every line that starts with a command in capitals is a layer. Docker tries to cache the layers so changing and rebuilding an image will be quick.
From top to bottom:
- Take a Docker image called
rubyand install version3.3. This is an officially maintained image that is based on a Debian distro with all the necessary tools, libraries and packages for working with Ruby projects already installed. As explained before, this image can be found in Docker Hub. - Run
curlandapt-getto install node.js - Switch to the project root
- Copy the Gemfile from the
docsdirectory to adocsdirectory inside the image. We do not have any volume binding yet, so we need to make a basic setup inside the image. - Switch to the
/site/docsdirectory and install bundler and all the gems required for our Jekyll site. - Expose the default port of
jekyll serveto the outside - Define the default command. This means when the image is built and the container is up and running this command is executed already.
More information on the Dockerfile syntax can be found in the docs
NOTE This image assumes there is a docs directory in the current directory that contains a Gemfile.
Now that the image is defined, we can go on to define the specifics for the container. This is done with a docker-compose.yml file.
Docker Compose
If you study the Dockerfile closely you notice that there is no concept of mounting your files in the container. That is left to the container definition which can be done using a docker-compose.yml file. While a Dockerfile is defining a single image, a docker-compose.yml file can actually use multiple images to combine them into a development stack. An example of such a stack would be a WordPress environment that consists of two containers, one for the webserver and all the PHP files that make the WordPress site go and one for the database that holds all the website content.
We are not going to dive deep into the syntax of docker-compose.yml, but we are only going to touch on the elements that are relevant for this example. More information on the complete syntax can be found in the Compose file reference documentation.
Create a file called docker-compose.yml in the root directory of your project. In this case we are using the pbs-jekyll-demoSite project.
pbs-jekyll-demoSite
├── docker-compose.yml
├── Dockerfile
├── docs
│   ├── _config.yml
...
│   ├── Gemfile
│   ├── Gemfile.lock
└── README.md
Add the following content to the docker-compose.yml file.
services:
  jekyll:
    build: . # Build from current project directory
    container_name: demo-site
    ports:
      - "4000:4000"
      - "35729:35729"  # LiveReload port
    volumes:
      - .:/site
    working_dir: /site/docs
    command: bundle exec jekyll serve --host 0.0.0.0 --livereload --force_polling --drafts
    stdin_open: true
    tty: true
In docker-compose.yml, a container is called a service. In this config, we have one service called jekyll. In a multi-container setup like the WordPress example, there would be a second service defining the database, usually called db, but any name will do.
The build element indicates the directory to be used for the build. This is where the Dockerfile can be found and all the files required for the image.
The container_name defines the name of this container. If this element is absent, a name is generated.
The ports element maps ports outside of the container to ports inside the container. The syntax is HOST:CONTAINER, so the first number defines the port on your computer and the second the port inside the container. In the first line port 4000 on your computer is mapped to port 4000 inside the container. This means that the jekyll site inside the container can be found on http://localhost:4000 in your browser. Just to make this syntax absolutely clear: if we would like to find the site on port 80 in our browser, the port mapping would be “80:4000”.
The second port mapping is for Jekyll’s LiveReload port so your browser will automatically refresh the site when any changes are noticed and processed.
The volumes element defines the mapping of the volumes.
The actual project files, aka your current project directory, are mapped to the /site directory inside the container. So the ./docs directory will be at /site/docs inside the container.
Remember that we copied the Gemfile from the docs directory into image in the Dockerfile? That was necessary because this volume binding was not available yet. With the volume binding definition in the docker-compose.yml the /site/docs directory is replaced by the actual docs directory from the project directory.
The working_dir element defines the directory to use as current directory. Note that this is the absolute path inside the container.
The command element defines the command to execute the first time the container is started. Note that the Dockerfile has the same command, but any command in this element will override the one in the Dockerfile. In this case, this one has an extra argument, --drafts.
The stdin_open and tty elements are set to true. This means it’s possible to send input to the container through the standard input and attach a pseudo-TTY to the container and therefore get access to the input and output features. This makes it possible to enter the container or tell the container to execute a command and provide the output.
Starting the Container
Now that we have all the configuration files in place, it’s finally time to start the container. We are using a docker-compose.yml file, so the command will be
docker compose up
Docker will first check if it already has an up-to-date image that matches the Dockerfile. If not, it will pull in all the necessary files and create the image. After that, the instructions in the docker-compose file will be executed and the container will mount the project files and run bundle exec jekyll serve with the appropriate flags. Once this is done your terminal window looks something like this
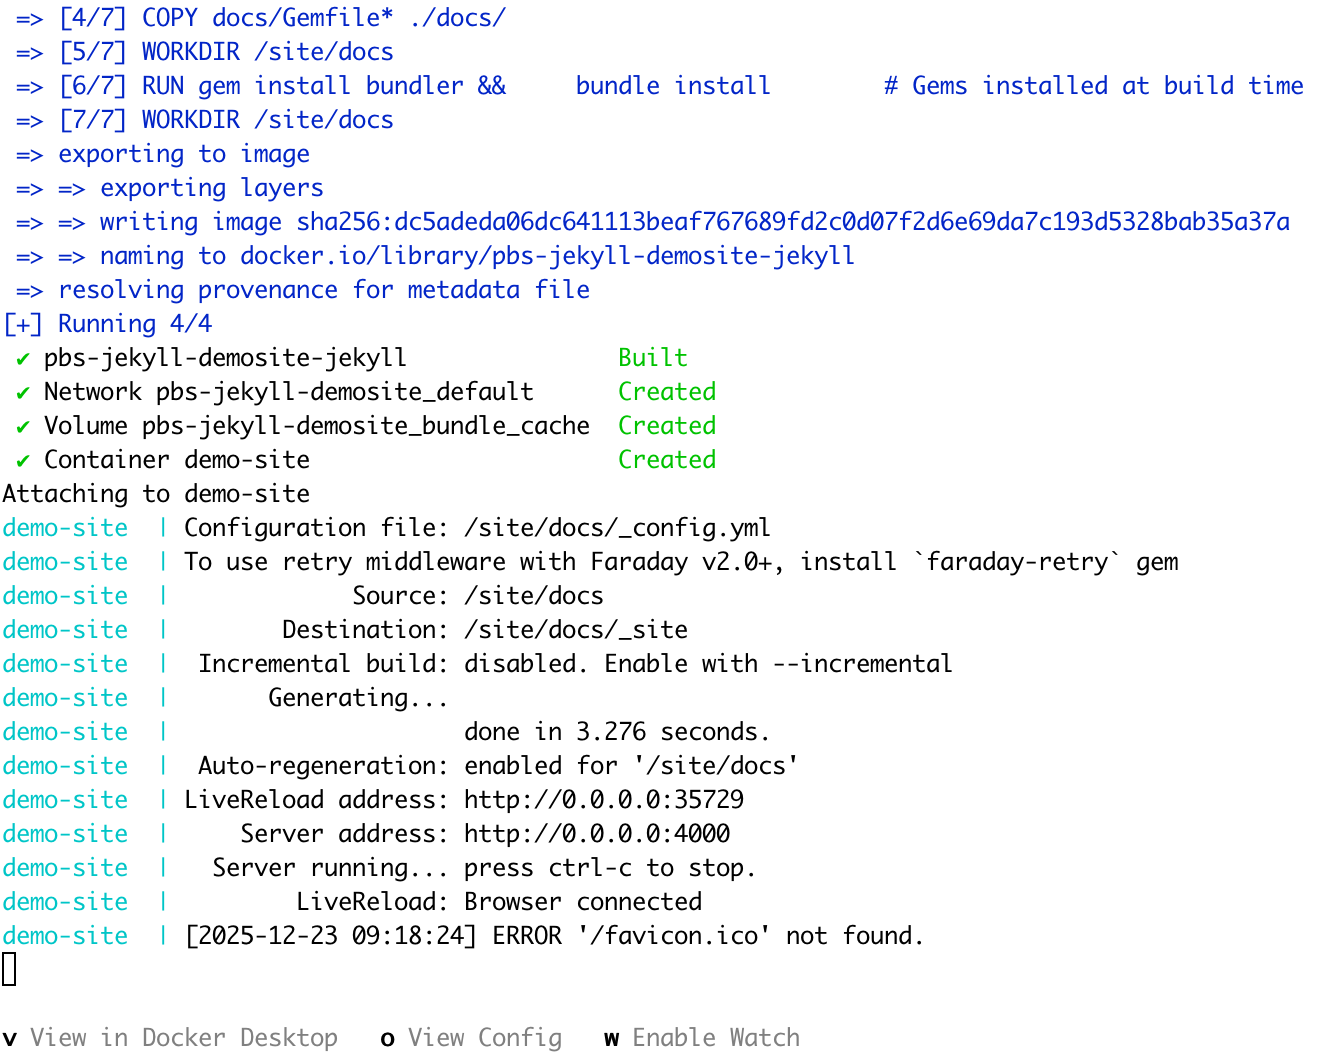
If we now go over to our favourite browser and go to http://localhost:4000 we are greeted with the front page of the site.
To stop the jekyll server we can follow instructions on screen and press CTRL-C. This will also stop the container.
Restart the container with docker compose up -d to start the container in a detached mode. Stopping the container in this case can be done with the command docker compose down.
Makefile
The commands to start and stop the container are relatively straightforward but they are more commands to remember and since Docker is designed to run from the command line it has a laundry list of flags that are necessary or handy to be used.
To make this easier on ourselves and to make it more consistent, we can start using the make command. This command allows us to basically create our own vocabulary to work with our project and the container.
Makefile Syntax
We won’t cover the full Makefile syntax in depth because there is an excellent tutorial available at Learn Makefiles, and since the tool has existed for so long, there is plenty of documentation out there. Here, we will only look at the elements needed to create our own Makefile.
The short version to use the make tool: if the Makefile defines a build target called install it can be executed using make install in the same directory where the Makefile is.
Let’s look at how such a build target is defined by creating a target for our ‘start container’ command.
In the project root, create a file called Makefile (also, case-sensitive and no extension) with the following content:
up: ## Start the Jekyll server in the background
	@docker-compose up -d
This creates the build target ‘up’. Make calls a build target a rule.
Every line below this line will be executed as part of this rule. Note that all these lines should be indented with a TAB character, no spaces. Failing to comply means make will either complain, or the command will not be executed properly.
A line that starts with a ‘@’ character tells make to stop echoing the command to the terminal.
We can now start our container with the command
make up
Adding a rule for stopping the container will be easy. Add the following below the up target.
down: ## Stop the Jekyll server
	@docker-compose down
make has a concept of dependencies, which means that before a rule is executed, the rules it depends on are executed first. This makes it trivial to define a ‘restart’ rule.
restart: down up ## Restart the Jekyll server
make was created for building software so it can check if files need to be recompiled. Therefore, the ‘name’ or target of a rule can be a filename. For example, a rule like this
*.c:
    @echo run this rule when any file with an extension of .c has changed.
will only be executed if there are one or more files in the current directory with an extension of .c AND at least one of them is modified since the last time make was run.
Make basically assumes that all the targets in a rule (in our case ‘up’, ‘down’ and ‘restart’) are files. So if we happen to create a file with one of these names, the rule will not be executed any more.
To prevent this from happening we need to tell make that these are not actual files. For this we can use the keyword .PHONY. By adding the following line at the top of our Makefile, we can tell make to ignore the search for files that have names that match our rule targets.
.PHONY: up down restart
Now we can go on and add more rules, e.g. for entering the container, for rebuilding the container when the Gemfile has changed and a lot of other handy snippets.
If we need to remember all these rules, what did we gain by introducing make?
To prevent losing our minds we can add another rule called help and make it our default rule. Put the following text above the first rule, below the .PHONY line. make considers the first rule in the Makefile to be the default rule, but we can add a .DEFAULT_GOAL keyword just to be sure.
# Default target
.DEFAULT_GOAL := help

help: ## Show this help message
	@echo "Jekyll Docker Development Commands"
	@echo ""
	@grep -E '^[a-zA-Z_-]+:.*?## .*$$' $(MAKEFILE_LIST) | sort | awk 'BEGIN {FS = ":.*?## "}; {printf "  %-20s %s\n", $$1, $$2}'
So now, if we run make help or simply make, we will get a list of all available rules with their description. Note that the description is the text after the double hashes. This gives us an easy way to maintain documentation of the rules without having to constantly remember to update the help rule.
Note that the grep line uses the built-in variable MAKEFILE_LIST to get all rules in the Makefile.
With this knowledge we can spruce up our Makefile with colours by adding colour variables at the top of our Makefile.
# Colors for output
GREEN  := \033[0;32m
YELLOW := \033[0;33m
NC     := \033[0m # No Color

# Default target
.DEFAULT_GOAL := help

help: ## Show this help message
	@echo "$(GREEN)Jekyll Docker Development Commands$(NC)"
	@echo ""
	@grep -E '^[a-zA-Z_-]+:.*?## .*$$' $(MAKEFILE_LIST) | sort | awk 'BEGIN {FS = ":.*?## "}; {printf "  $(YELLOW)%-20s$(NC) %s\n", $$1, $$2}'
When we run the make command now, the first line will be green and the rule targets will be yellow.
Let’s add more rules, so the complete Makefile looks like this
.PHONY: build up down restart shell clean install bundle-update serve serve-drafts logs help

# Colors for output
GREEN  := \033[0;32m
YELLOW := \033[0;33m
NC     := \033[0m # No Color

# Default target
.DEFAULT_GOAL := help

help: ## Show this help message
	@echo "$(GREEN)Jekyll Docker Development Commands$(NC)"
	@echo ""
	@grep -E '^[a-zA-Z_-]+:.*?## .*$$' $(MAKEFILE_LIST) | sort | awk 'BEGIN {FS = ":.*?## "}; {printf "  $(YELLOW)%-20s$(NC) %s\n", $$1, $$2}'

up: ## Start the Jekyll server in the background
	@docker-compose up -d
	@echo "$(GREEN)Jekyll server starting at http://localhost:4000$(NC)"
	@echo "$(GREEN)LiveReload available at http://localhost:35729$(NC)"

down: ## Stop the Jekyll server
	@docker-compose down

restart: down up ## Restart the Jekyll server

build: ## Build the Docker image
	@docker-compose build

serve: ## Start Jekyll in foreground with logs (no drafts)
	@docker-compose run --rm --service-ports jekyll bundle exec jekyll serve --host 0.0.0.0 --livereload --force_polling

serve-drafts: ## Start Jekyll in foreground with logs (include drafts)
	@docker-compose run --rm --service-ports jekyll bundle exec jekyll serve --host 0.0.0.0 --livereload --force_polling --drafts

shell: ## Open a bash shell in the Jekyll container
	@docker-compose run --rm jekyll bash

install: ## Install dependencies (after adding to Gemfile)
	@docker-compose run --rm jekyll bundle install
	@echo "$(GREEN)Dependencies installed. Run 'make restart' to apply changes.$(NC)"

bundle-update: ## Update all gems
	@docker-compose run --rm jekyll bundle update
	@echo "$(GREEN)Gems updated. Run 'make restart' to apply changes.$(NC)"

clean: ## Remove all containers, volumes, and generated site
	@docker-compose down -v
	@rm -rf docs/_site docs/.jekyll-cache docs/.jekyll-metadata
	@echo "$(GREEN)Cleaned up Docker containers, volumes, and Jekyll cache$(NC)"

logs: ## Show Jekyll server logs
	@docker-compose logs -f jekyll
Now it’s possible to build the Docker image with make build, drop into the container with make shell and clean everything up with make clean.
✂️ This concludes the content of the first podcast
Reusing the Docker image
Now that we have our Jekyll development environment, we should be able to reuse it in the PBS project. After all, that is also a Jekyll site.
The simplest way is to simply copy the three files we created Dockerfile, docker-compose.yml, and Makefile to the root of the PBS project, and we’re done. Especially since the pbs-jekyll-demoSite is just a temporary project and can be thrown away. But what if it’s another important project we want to keep and develop further?
Although there is still nothing wrong with copying the files and reusing them in the PBS project, there are some caveats. First of all, you cannot run the containers side-by-side because they use the same container name and the same ports. Sure, that’s easily fixed, but there are more subtle problems. Remember that the Dockerfile copied the Gemfile into the image and ran bundle install. This means that all gems inside the image are those defined by the Gemfile of the project we used when we built the image, aka the demoSite project. It’s more than likely that the PBS site uses a lot more gems.
Now we can, of course, update the image with the gems necessary for the PBS site and rebuild the container for the demoSite based on the updated image, but that still means they share the gems in the library, or, going back to our analogy, two food trucks that share the available set of knives. That is not complete isolation, and of course, it also does not replicate the production environment because in production, both projects are isolated and only have their own dependencies.
So we need to update the image to take out the command to install the gems in the image and move that to the container. That way each container has only its own set of requirements. Added bonus is that now, whenever the Gemfile changes, we no longer have to rebuild the image. We just need to rebuild the container, which is a lot faster.
For starters, we have to figure out how to make sure the bundle install is run before the bundle exec jekyll serve command is run, or we get errors about Jekyll not being available.
The easy solution is to remove the jekyll serve command from the container as well and run it manually from the Makefile. This works and will considerably simplify both the Dockerfile and the Docker Compose file, but it will put the mental load on us to remember that when the container is started, we need to run the bundle install and the jekyll serve commands.
Let’s make this easier for ourselves by having Docker handling this. First, we add an entrypoint to the Dockerfile. An entrypoint is a way to configure a container to run as an executable. So if we tell the entrypoint to run a script, the script will automatically run on the start of the container.
The script to be run can be added to the Dockerfile as well, so we don’t have to manage a separate script.
The Dockerfile now becomes
# Base this image on the official Docker image for Ruby
FROM ruby:3.3

# Install Node.js (needed for some Jekyll plugins)
RUN curl -fsSL https://deb.nodesource.com/setup_20.x | bash - && \
    apt-get install -y nodejs && \
    rm -rf /var/lib/apt/lists/*

# Install bundler
RUN gem install bundler

# Set working directory to project root
WORKDIR /site

# Smart entrypoint
COPY <<'EOF' /usr/local/bin/docker-entrypoint.sh
#!/bin/bash
set -e

# Only install/update if needed
if [ -f "Gemfile" ]; then
  if ! bundle check > /dev/null 2>&1; then
    echo "📦 Installing gems..."
    bundle install
  fi
fi

# Execute the main command
exec "$@"
EOF

# make the script executable
RUN chmod +x /usr/local/bin/docker-entrypoint.sh

# Expose Jekyll's default port
EXPOSE 4000

# Set the entrypoint to the script
ENTRYPOINT ["/usr/local/bin/docker-entrypoint.sh"]

# Default command
CMD ["bundle", "exec", "jekyll", "serve", "--host", "0.0.0.0", "--livereload", "--force_polling"]
We now took the command to run bundle install out of the Dockerfile and replaced it with a COPY command that copies the content of the here-document into a script that is stored in the image.
This script checks if the Gemfile exists, and if so, it runs bundle install. In turn, bundle will check if anything needs to be actually installed.
Here-doc
A here-document (or here-doc) is a Bash feature that lets you pass a block of text directly to a command as its standard input, instead of reading it from a file or typing it interactively. It allows you to embed multi-line input in a script and feed it to a command in one place.
cat <<EOF
This text is sent to the cat command.
EOF
Everything between the markers is treated as input to the command.
The docker-compose.yml file will now take care of the correct Gemfile that is used to install the gems. This file will also contain project specific information such as the name of the container and the local port sprinkled throughout the file.
Everybody knows the copy & paste bug: you copy a file and forget to change one or more of the variables. Let’s try to avoid that by introducing variables for those project specific bits and pieces. This also makes our docker-compose.yml file more generic. The compose file supports environment variables so we can use the method of defining an .env file that define the variables for the project specific information and have a generic compose file that can pick up the variables and create a project specific container.
Moving to Generic Files With a Reusable Image
Replace the content of the docker-compose.yml file with
services:
  jekyll:
    image: ${BASE_IMAGE:-jekyll-base:latest}
    container_name: ${CONTAINER_NAME:-jekyll-site}
    ports:
      - "${JEKYLL_PORT:-4000}:4000"
      - "${LIVERELOAD_PORT:-35729}:35729"
    volumes:
      - .:/site
      - gems:/usr/local/bundle  # Simple name, Docker prefixes it automatically
    working_dir: /site/docs
    environment:
      - JEKYLL_ENV=${JEKYLL_ENV:-development}
    stdin_open: true
    tty: true

volumes:
  gems:  # Docker Compose creates it as {COMPOSE_PROJECT_NAME}_gems
And we need to add a .env file with the variables set to a value that works for this project. Let’s move the original info to the .env file
# ============================================
# Project Configuration
# ============================================
# Unique identifier for this project
COMPOSE_PROJECT_NAME=demo_site

# Container name (must be unique across all running containers)
CONTAINER_NAME=demo-site

# ============================================
# Port Configuration
# ============================================
# Port for Jekyll site (4000 is default, use 4001+ for additional projects)
JEKYLL_PORT=4000

# Port for LiveReload (35729 is default, use 35730+ for additional projects)
LIVERELOAD_PORT=35729

# ============================================
# Image Configuration
# ============================================
# Base Docker image to use
BASE_IMAGE=jekyll-base:latest

# Path to base Dockerfile
# Default: ~/docker-images/jekyll-github-pages/Dockerfile
# Change this if your Dockerfile is in a different location
DOCKERFILE_PATH=./Dockerfile

# ============================================
# Jekyll Configuration
# ============================================
# Jekyll environment (development, production)
JEKYLL_ENV=development
The Updated Makefile
.PHONY: help rebuild-base ensure-base up down restart logs shell install update-gems clean clean-all status serve serve-drafts

# Load environment variables from .env
include .env
export

# Default Dockerfile location if not set in .env
DOCKERFILE_PATH ?= ~/docker-images/jekyll-github-pages/Dockerfile

# Extract directory from Dockerfile path
DOCKERFILE_DIR := $(dir $(DOCKERFILE_PATH))

# Colors
GREEN  := \033[0;32m
YELLOW := \033[0;33m
BLUE   := \033[0;34m
RED    := \033[0;31m
NC     := \033[0m

help: ## Show this help message
	@echo "$(GREEN)Jekyll Docker Commands for $(COMPOSE_PROJECT_NAME)$(NC)"
	@echo ""
	@echo "$(BLUE)Configuration (from .env):$(NC)"
	@echo "  Project:     $(COMPOSE_PROJECT_NAME)"
	@echo "  Container:   $(CONTAINER_NAME)"
	@echo "  Dockerfile:  $(DOCKERFILE_PATH)"
	@echo "  Jekyll URL:  http://localhost:$(JEKYLL_PORT)"
	@echo "  LiveReload:  http://localhost:$(LIVERELOAD_PORT)"
	@echo ""
	@echo "Available commands:"
	@grep -hE '^[a-zA-Z_-]+:.*?## .*$$' $(MAKEFILE_LIST) | \
		sort | \
		awk 'BEGIN {FS = ":"}; {split($$2,a,"## "); printf "  $(YELLOW)%-20s$(NC) %s\n", $$1, a[2]}'

rebuild-base: ## Rebuild base image from Dockerfile
	@echo "$(YELLOW)Rebuilding base image from $(DOCKERFILE_PATH)...$(NC)"
	@if [ -f "$(DOCKERFILE_PATH)" ]; then \
		if [ "$(VERBOSE)" = "1" ]; then \
			cd $(DOCKERFILE_DIR) && docker build -f $(DOCKERFILE_PATH) -t $(BASE_IMAGE) .; \
		else \
			cd $(DOCKERFILE_DIR) && docker build -f $(DOCKERFILE_PATH) -t $(BASE_IMAGE) . > /dev/null 2>&1 || \
			(echo "$(YELLOW)Build failed, showing output:$(NC)" && \
			 cd $(DOCKERFILE_DIR) && docker build -f $(DOCKERFILE_PATH) -t $(BASE_IMAGE) .); \
		fi; \
		echo "$(GREEN)✓ Base image rebuilt: $(BASE_IMAGE)$(NC)"; \
	else \
		echo "$(RED)Error: Dockerfile not found at $(DOCKERFILE_PATH)$(NC)"; \
		exit 1; \
	fi

ensure-base: ## Ensure base image exists (builds if missing)
	@if [ -z "$$(docker images -q $(BASE_IMAGE) 2>/dev/null)" ]; then \
		echo "$(YELLOW)Base image $(BASE_IMAGE) not found. Building...$(NC)"; \
		$(MAKE) rebuild-base; \
	fi

up: ensure-base ## Start Jekyll server
	@echo "$(GREEN)Starting Jekyll server for $(COMPOSE_PROJECT_NAME)...$(NC)"
	@docker-compose up -d
	@echo "$(GREEN)✓ Server started at http://localhost:$(JEKYLL_PORT)$(NC)"
	@echo "$(BLUE)Tip: Use 'make logs' to see output$(NC)"

down: ## Stop Jekyll server
	@echo "$(YELLOW)Stopping Jekyll server...$(NC)"
	@docker-compose down
	@echo "$(GREEN)✓ Server stopped$(NC)"

restart: down up ## Restart Jekyll server

serve: ensure-base ## Start Jekyll in foreground (with logs)
	@echo "$(GREEN)Starting Jekyll server in foreground...$(NC)"
	@echo "$(BLUE)Press Ctrl+C to stop$(NC)"
	@docker-compose up

serve-drafts: ensure-base ## Start Jekyll in foreground with drafts included
	@echo "$(GREEN)Starting Jekyll server with drafts in foreground...$(NC)"
	@echo "$(BLUE)Press Ctrl+C to stop$(NC)"
	@docker-compose run --rm --service-ports jekyll bundle exec jekyll serve --host 0.0.0.0 --livereload --force_polling --drafts

logs: ## Show Jekyll server logs (follow)
	@docker-compose logs -f jekyll

logs-tail: ## Show last 50 lines of logs
	@docker-compose logs --tail=50 jekyll

status: ## Show container status
	@echo "$(BLUE)Container Status:$(NC)"
	@docker-compose ps
	@echo ""
	@echo "$(BLUE)Volume Status:$(NC)"
	@docker volume ls | grep "$(COMPOSE_PROJECT_NAME)" || echo "No volumes found"

shell: ## Open bash shell in container
	@echo "$(BLUE)Opening shell in $(CONTAINER_NAME)...$(NC)"
	@docker-compose exec jekyll bash || docker-compose run --rm jekyll bash

install: ensure-base ## Install/update gems from Gemfile
	@echo "$(YELLOW)Installing gems for $(COMPOSE_PROJECT_NAME)...$(NC)"
	@docker-compose run --rm jekyll bundle install
	@echo "$(GREEN)✓ Gems installed$(NC)"

update-gems: ensure-base ## Update all gems to latest versions
	@echo "$(YELLOW)Updating all gems...$(NC)"
	@docker-compose run --rm jekyll bundle update
	@echo "$(GREEN)✓ Gems updated$(NC)"
	@echo "$(BLUE)Consider committing the updated Gemfile.lock$(NC)"

check-gems: ensure-base ## Check if gems are installed and up to date
	@echo "$(BLUE)Checking gem status...$(NC)"
	@docker-compose run --rm jekyll bundle check && \
		echo "$(GREEN)✓ All gems are installed and up to date$(NC)" || \
		echo "$(YELLOW)⚠ Some gems need to be installed. Run 'make install'$(NC)"

add-gem: ensure-base ## Add a gem (usage: make add-gem GEM=gem-name)
ifndef GEM
	@echo "$(RED)Error: Please specify GEM=gem-name$(NC)"
	@echo "Example: make add-gem GEM=jekyll-seo-tag"
else
	@echo "$(YELLOW)Adding gem: $(GEM)$(NC)"
	@docker-compose run --rm jekyll bundle add $(GEM)
	@echo "$(GREEN)✓ Gem added. Restart server with 'make restart'$(NC)"
endif

clean: ## Stop server and remove containers (keeps gems)
	@echo "$(YELLOW)Cleaning up containers...$(NC)"
	@docker-compose down
	@rm -rf docs/_site docs/.jekyll-cache docs/.jekyll-metadata
	@echo "$(GREEN)✓ Containers and generated files removed$(NC)"
	@echo "$(BLUE)Gems are preserved in volume$(NC)"

clean-all: ## Remove everything including gem cache
	@echo "$(RED)⚠ This will remove all gems and require reinstall!$(NC)"
	@read -p "Are you sure? [y/N] " -n 1 -r; \
	echo; \
	if [[ $$REPLY =~ ^[Yy]$$ ]]; then \
		echo "$(YELLOW)Removing containers and volumes...$(NC)"; \
		docker-compose down -v; \
		rm -rf docs/_site docs/.jekyll-cache docs/.jekyll-metadata; \
		echo "$(GREEN)✓ Everything removed$(NC)"; \
	else \
		echo "$(BLUE)Cancelled$(NC)"; \
	fi

# Default target
.DEFAULT_GOAL := help
What Changed in the Compose File
Let’s study the files more closely to understand the changes. As explained, several configuration elements are changed to a variable. All these variables have a default value, so the compose file still works when there is no .env file. The syntax to define the default values is similar to the way bash specifies defaults to variables.
The second change is the fact that the Jekyll service defines which image it uses. If the image is not present in the local Docker environment, as can be seen in the Docker Desktop dashboard, it will be searched in the Docker Hub online.
Another change is the definition of a named volume. It tells Docker to map /usr/local/bundle to this named volume and to manage it. This means that on spinning up the container, Docker creates storage somewhere labelled with the defined name and copies the content of /usr/local/bundle into it. The storage is not part of your project, aka there will not be any <volume name> directory in your project directory, but Docker knows how to find it.
The previous sentence has been intentionally vague about the name of the volume, although it mentions ‘gems’ in the compose file. Because we have added a variable COMPOSE_PROJECT_NAME Docker will use that as prefix to this volume name. So in this example the volume name will become demo_site_gems.
This ensures that every container will get its own volume.
Using this volume allows the installed gems to persist across container restarts and even destruction. This ensures the slow process of installing the gems is only done in the initial start of the container or because the Gemfile is changed. In all other situations the container starts very quickly.
The easiest way to see and inspect the volume, or delete it, is to use the Docker Desktop Dashboard. Select ‘Volumes’ in the sidebar and find the demo_site_gems.
What Changed in the Makefile
The Makefile has got a lot of changes, let’s go through them.
Use of the .env Contents
Now that we have put the project-specific variables into a separate .env file, it is possible to use those variables in the Makefile. This also makes the Makefile more generic, and it allows us to add some info on the project to the help target. If you now run make or make help, you will see a nice display of the content of the .env file.
More and updated rules
The main change in the rules is the result of the fact that the compose file expects an image with a certain name to exist. This means we need to build that image before the container can actually use it. Yes, this is similar to before, but this time the compose file cannot default to the Dockerfile that is in the same directory as the compose file, because the compose file expects an image with a specific name.
We can add a rule in the Makefile to create the image with the specified name. This is the rebuild-base rule. And now that we use the .env contents, we can make sure the image name is the one expected by the compose file.
But what if we forget to build the image before we run make up to start the container? No problem, we just let Make handle this. We created a rule ensure-base that checks if the image exists, and if not, it calls the rebuild-base rule.
In the up rule, we now add a dependency on ensure-base. Together, this makes sure that whenever we run make up, make checks if the image exists and if not, builds it for us.
All the moving pieces are now in place so let’s see if it all works by running make up. We expect that, just as before, we can open http://localhost:4000 in our browser and see the front page of the demo site. If all is correct, the terminal shows
$make up
Starting Jekyll server for demo_site...
[+] Running 2/2
 ✔ Network demo_site_default  Created
 ✔ Container demo-site        Started
✓ Server started at http://localhost:4000
Tip: Use 'make logs' to see output
And all this with nice colours. A quick check of the website shows the demo site is up and running.
Adding the Docker Configuration to the PBS Project
Now that we have created a setup that should be generic enough to be reused, we can put it to the test.
Although these containers should eventually be able to run side by side, let’s not get ahead of ourselves and stop the demo site container using the make down command.
$make down
Stopping Jekyll server...
[+] Running 2/2
 ✔ Container demo-site        Removed
 ✔ Network demo_site_default  Removed
✓ Server stopped
Copy the Dockerfile, docker-compose.yml, .env and Makefile files to the root of the PBS project.
Without any changes if we run this configuration with make up we should get the PBS project in our browser locally.
Does it work? Yes and no. No, we don’t see the website in our browser at http://localhost:4000 but if we check the logs with make logs, we see that there is a problem with a missing repo. So the problem is in the Jekyll setup, not in our Docker configuration.
Troubleshooting Differences Between GitHub Pages and Docker Environments
Do we call victory? Not yet. We also want to test if we can truly run both containers side-by-side, and for that, it would be nice if we could fix this repo problem so we can truly run both websites side-by-side.
The actual error in make logs shows
No repo name found. Specify using PAGES_REPO_NWO environment variables, 'repository' in your configuration, or set up an 'origin' git remote pointing to your github.com repository.
After some troubleshooting, the problem is clear: in GitHub Pages, the PAGES_REPO_NWO variable is set automatically, but locally it is not set. There are several solutions to this problem. One is to set this environment variable in the compose and .env files, or we can add the repository element to the docs/_config.yml file. The latter is either picked up or overridden by GitHub Pages, so there is no difference between GitHub Pages and our local Docker environment.
However, to make absolutely sure we don’t accidentally break production, we can also override the config file with a dev version. This means we can actually make changes to the config file that are only picked up locally AND we can still add it to git where it is not picked up by GitHub Pages.
This sounds contradictory to the previous paragraph, but its advantages will become clear later on.
For now, we need to make a few changes:
- create
docs/_config_dev.ymland add the following linerepository: bartificer/programming-by-stealth - update the
docker-compose.ymlfile to use this file by adding acommandelement that uses thisconfig_devfile. By adding a similar command to thedocker-compose.ymlfile, we override the default command from the image with a specific one for this docker-compose file.
The docker-compose.yml file now becomes
services:
  jekyll:
    image: ${BASE_IMAGE:-jekyll-base:latest}
    container_name: ${CONTAINER_NAME:-jekyll-site}
    ports:
      - "${JEKYLL_PORT:-4000}:4000"
      - "${LIVERELOAD_PORT:-35729}:35729"
    volumes:
      - .:/site
      - gems:/usr/local/bundle  # Simple name, Docker prefixes it automatically
    working_dir: /site/docs
    environment:
      - JEKYLL_ENV=${JEKYLL_ENV:-development}
    command: bundle exec jekyll serve --host 0.0.0.0 --livereload --force_polling --config _config.yml,_config_dev.yml
    stdin_open: true
    tty: true

volumes:
  gems:  # Docker Compose creates it as {COMPOSE_PROJECT_NAME}_gems
There is a change in the compose file, so we need to rebuild the container.
make restart
Now, any change to any of these files will trigger Jekyll to rebuild the site and automatically update your browser, but sometimes the outcome does not meet the expectations either we see an error where we don’t expect one or vice versa. The quickest way is to rebuild everything and start over, which can easily be done with:
make clean-all
Fixing the Path to the Assets
As usual, once an error is fixed a new problem pops up. This time the website does load but there is no formatting nor images. When we inspect the code we see links like <img src="/pages/bartificer/programming-by-stealth/assets/logo.png" ...>.
Surely, that path does not exist locally. The problem lies in the fact that the theme uses links like
{{site.github.baseurl}}/assets/logo.png
The variable is resolved to /pages/bartificer/programming-by-stealth, which might work perfectly fine in GitHub Pages, but not in our local environment.
There are two ways to solve this problem, one is to modify the template file and the disable the GitHub behaviour. We will try both.
Overriding the Layout File
The best practice to solve this behaviour seems to be to replace all syntax like {{site.github.baseurl}}/assets/logo.png with {{ '/assets/logo.png' | relative_url }} in the _layouts/default.html template of the theme.
The theme, however, is a remote theme, in a separate repository. It is not clear if this theme is only used for the PBS project or also in other projects, so for now it’s a no-go to modify the theme directly.
Note to Bart
Seems like a good idea to update your template with this change anyway. 😉
We can use the Jekyll override functionality and create a local docs/_layouts/default.html file that has these changes. When we add this file, Jekyll will immediately rebuild, and all looks fine. However, we don’t want to be tripped up by caching issues, so we start fresh after a make clean-all.
After make up the website is displayed with all the markup and images in place again.
We could declare the problem solved, but we have no way of testing if this works in production other than just push the change and hope GitHub Pages will not fall over in a heap. Let’s leave that for a different moment.
For now, we will disable this file by simply renaming it so Jekyll will not recognise it as an override for the default template.
Overriding the GitHub variable
The other solution to the problem is to override the GitHub related path resolve functionality by adding the following to our _config_dev.yml file.
# Manually set github values to prevent errors
github:
  baseurl: ""
This sets the site.github.baseurl to an empty string so the paths will be correct.
If we now do a final make clean-all and make up we should see the PBS site in a nice formatted form in our browser.
Running Both Containers Side by Side
Now that the PBS website works, lets go back to our final test and try to run both containers (PBS and demo site) side by side. To make that work, we need to update some variables because each container needs to have a unique name and of course both servers need to use different ports.
Since we simply copied the .env file from the demo site to the PBS project, the container is still called demo-site, which is visible in the logs.
Let’s correct that. Bring the container down with make down to avoid the container still being active when we change the name in the .env file and start it up again.
While we’re changing the .env file let’s also change the other moving parts:
- update
COMPOSE_PROJECT_NAMEto a more relevant name - update
CONTAINER_NAMEto a more relevant name - now that we’re busy changing, we might as well change the
JEKYLL_PORTto 8080 so that we can use the default port for temporary projects such as the demo site - we can do the same for the
LIVERELOAD_PORT.
So the updated version of the .env file looks like
# ============================================
# Project Configuration
# ============================================
# Unique identifier for this project
COMPOSE_PROJECT_NAME=pbs

# Container name (must be unique across all running containers)
CONTAINER_NAME=pbs

# ============================================
# Port Configuration
# ============================================
# Port for Jekyll site (4000 is default, use 4001+ for additional projects)
JEKYLL_PORT=8080

# Port for LiveReload (35729 is default, use 35730+ for additional projects)
LIVERELOAD_PORT=35730

# ============================================
# Image Configuration
# ============================================
# Base Docker image to use
BASE_IMAGE=jekyll-base:latest

# Path to base Dockerfile
# Default: ~/docker-images/jekyll-github-pages/Dockerfile
# Change this if your Dockerfile is in a different location
DOCKERFILE_PATH=./Dockerfile

# ============================================
# Jekyll Configuration
# ============================================
# Jekyll environment (development, production)
JEKYLL_ENV=development
Run make up and check that the PBS site is available at http://localhost:8080.
Now switch to the demo site project and run the container there too, but before we do that, we make one change: the location of the Dockerfile. Currently, both projects have a Dockerfile, and the DOCKERFILE_PATH has the path to the Dockerfile. If we want true reuse, we should have only one Dockerfile. Since the demo site is a temporary project, let’s remove the Dockerfile there and update the .env file to point to the Dockerfile in the PBS project.
The updated .env file will be
# ============================================
# Project Configuration
# ============================================
# Unique identifier for this project
COMPOSE_PROJECT_NAME=demo_site

# Container name (must be unique across all running containers)
CONTAINER_NAME=demo-site

# ============================================
# Port Configuration
# ============================================
# Port for Jekyll site (4000 is default, use 4001+ for additional projects)
JEKYLL_PORT=4000

# Port for LiveReload (35729 is default, use 35730+ for additional projects)
LIVERELOAD_PORT=35729

# ============================================
# Image Configuration
# ============================================
# Base Docker image to use
BASE_IMAGE=jekyll-base:latest

# Path to base Dockerfile
# Default: ~/docker-images/jekyll-github-pages/Dockerfile
# Change this if your Dockerfile is in a different location
DOCKERFILE_PATH=../programming-by-stealth/Dockerfile

# ============================================
# Jekyll Configuration
# ============================================
# Jekyll environment (development, production)
JEKYLL_ENV=development
To make sure we don’t have any lingering demo-site related containers and installed gems, start fresh with
make clean-all
make up
The demo site is now at http://localhost:4000 while the PBS site still runs at http://localhost:8080.
No image building was necessary for the demo site.
Conclusion of our example
With only four files added to existing projects and a minor tweak to the PBS project, we managed to create a reusable local development environment that allows us to build Jekyll sites locally, which mimics production as much as possible and keeps our local computer clean of all the necessary tools. And between Allison and Bart, they can use the same environment without having to worry about discrepancies in versions and subtle changes in their local setup.
Adding Github Actions to our Docker environment
Now that we have our local development environment working for the PBS project, wouldn’t it be nice if we could also run GitHub actions locally?
The Problem to Be Solved
In the PBS project, there is a GitHub action setup that runs Vale as a spell checker over all the content files. While it’s a nice feature, it’s quite tedious to go over to the GitHub site of the repo, find the Actions tab, find the latest output of the vale-linter job, look up the typos in the markdown files, fix them, commit, push, and wait for the job to finish and start again.
It would be much easier if we could run the Vale spell check locally and fix multiple typos at once before committing again. Also, locally, the spell check will run much faster because there is no overhead of the environment setup that the GitHub workflow must do.
Configuring Vale in the Docker Environment
We want to use Vale with the same configuration as the GitHub Action, so it can be run in both environments. We will not go deep into what Vale does; that can be left for another episode. Here, we focus on using Vale in our Docker environment.
Installing Vale
There are two ways to install Vale: one is in the image, and the other is on demand in the Makefile. For now, we go with the latter to see how it works. Eventually we can add it to the image.
Installing Using Make
Add the following to the Makefile
lint: ensure-base ## Run Vale linter
	@echo "$(YELLOW)Running Vale linter...$(NC)"
	@docker-compose run --rm \
		-e COLUMNS=${COLUMNS:-300} \
		-w /site \
		jekyll \
		sh -c '\
			if ! command -v vale >/dev/null 2>&1; then \
				echo "Installing Vale..."; \
				wget -q -O /tmp/vale.tar.gz https://github.com/errata-ai/vale/releases/download/v3.0.7/vale_3.0.7_Linux_64-bit.tar.gz && \
				tar -xzf /tmp/vale.tar.gz -C /usr/local/bin && \
				rm /tmp/vale.tar.gz && \
				chmod +x /usr/local/bin/vale; \
			fi && \
			vale --no-wrap --minAlertLevel="${LEVEL:-suggestion}" docs/'
	@echo "$(GREEN)✓ Linting complete$(NC)"
With this rule, the script checks inside the container to see if Vale is installed, and if not, it will install Vale and then run Vale on the files in the docs directory.
Now run make lint and look at the output. Vale will flag possible typos.
Here is a snippet of the output.
 docs/_tidbits/tidbit11.md
 64:318   error  Did you really mean 'Bashy'?            Vale.Spelling
 ...
 450:42   error  Did you really mean 'writting'?         Vale.Spelling
 478:1    error  Did you really mean 'mand'?             Vale.Spelling
 508:343  error  'that' is repeated!                     Vale.Repetition
...
 585:67   error  Did you really mean 'speically'?        Vale.Spelling
...

 docs/_tidbits/tidbit14.md
 20:222   error  Did you really mean 'cybersecurity'?  Vale.Spelling
 96:213   error  'ever' is repeated!                   Vale.Repetition
 120:151  error  Did you really mean 'hmmm'?           Vale.Spelling
 200:49   error  Did you really mean 'intial'?         Vale.Spelling
intial and speically are probably typos, while cybersecurity is just jargon. We can look up the line number in the specified file (line 200 in tidbit14.md for intial) and decide if it’s a true typo, and fix it, or it is actually jargon. In that case, the word can be added to the .github/styles/config/vocabularies/PBS/accept.txt file, and Vale will treat it as correct.
Now run the make lint command again, and the number of errors should be less than before. Personally, I find it a joyous game to bring the errors down as much as possible.
Having Vale available locally makes it much more usable. Again, Vale can do much more than spotting typos, but we’ll leave that for another time.
Installing in the Image
The previous setup was relatively easy, but the Make rule is very complicated and not very well maintainable. We can move the actual installation of Vale to the image, so it will also be available for all other projects which focus on a Jekyll based website with narrative content, e.g. Bart’s personal website should he decide to move it to Jekyll.
Moving the installation to the image involves several steps:
- put the installation instructions in the Dockerfile
- rebuild the image and container
- clean up the
make lintrule
Installing Vale in the Docker image means we add the installation instructions to the Dockerfile.
FROM ruby:3.3

# Install Node.js
RUN curl -fsSL https://deb.nodesource.com/setup_20.x | bash - && \
    apt-get install -y nodejs && \
    rm -rf /var/lib/apt/lists/*

# Install Vale
RUN wget -q -O /tmp/vale.tar.gz https://github.com/errata-ai/vale/releases/download/v3.0.7/vale_3.0.7_Linux_64-bit.tar.gz && \
    tar -xzf /tmp/vale.tar.gz -C /usr/local/bin && \
    rm /tmp/vale.tar.gz && \
    chmod +x /usr/local/bin/vale

# Install bundler
RUN gem install bundler
...
The docker-compose.yml does not need any changes. So to rebuild the image we simply run
make rebuild-base
Once that finishes, we can simplify the Makefile.
Note
Strictly speaking, the container should be rebuilt to pick up the changed image, but since we have already installed Vale in the container you can keep using the container as long as necessary.
When you restart the container, with
make restartthe old container will be removed and a new container based on the new version of the image will be restarted.
In the Makefile we can now update the lint target.
lint: ensure-base ## Run Vale linter
	@echo "$(YELLOW)Running Vale linter...$(NC)"
	@docker-compose run --rm \
		-e COLUMNS=${COLUMNS:-300} \
		-w /site \
		jekyll \
		vale --no-wrap --minAlertLevel="${LEVEL:-suggestion}" docs/
	@echo "$(GREEN)✓ Linting complete$(NC)"
With the make rule becoming simpler, we can even add extra rules that help with using Vale.
lint-warnings: ## Run Vale with warning level only
	@$(MAKE) lint LEVEL=warning


lint-errors: ## Run Vale with error level only
	@$(MAKE) lint LEVEL=error


lint-file: ## Lint specific file (usage: make lint-file FILE=docs/page.md)
ifndef FILE
	@echo "$(RED)Error: Please specify FILE=path/to/file$(NC)"
	@echo "Example: make lint-file FILE=docs/_tidbits/tidbits14.md"
else
	@echo "$(YELLOW)Linting $(FILE)...$(NC)"
	@docker-compose run --rm \
		-e COLUMNS=${COLUMNS:-300} \
		-w /site \
		jekyll \
		vale --no-wrap --minAlertLevel="${LEVEL:-suggestion}" $(FILE)
	@echo "$(GREEN)✓ Linting complete$(NC)"
endif
Using Docker in GitHub Actions - Updating the TTT Build Environment
Now that we have a local setup that precisely defines which tools, libraries and configurations we need to produce the output, why not use that in the GitHub actions that also produce that same output? It would simplify maintenance because we only have to add changes to one setup, not two.
This is exactly what we did for the Taming the Terminal project. After a long hiatus Bart and Allison decided to add a new TTT episode, but they were not able to build the website because time moved on and the requirements of the project became incompatible with the currently installed versions of Ruby and the other tools necessary to build the various outputs.
When moving the build script to a Docker setup we could ensure that, even if the various pieces become outdated, we can still run the build and not worry about the conflicting requirements.
Below is the new Dockerfile for the TTT project.
FROM asciidoctor/docker-asciidoctor:latest

USER root

# Tools needed for the build
RUN apk add --no-cache zip rsync git openjdk17-jre wget unzip vale

# Install hunspell + English GB dictionaries for Vale
RUN apk add --no-cache hunspell hunspell-en

# Install write-good Vale grammar rules inside the container
RUN mkdir -p /opt/vale/styles \
  && curl -sL https://github.com/errata-ai/write-good/releases/latest/download/write-good.zip \
     -o /tmp/write-good.zip \
  && unzip /tmp/write-good.zip -d /opt/vale/styles \
  && rm /tmp/write-good.zip

# Install epubcheck 4.2.6
RUN wget -O /tmp/epubcheck.zip https://github.com/w3c/epubcheck/releases/download/v4.2.6/epubcheck-4.2.6.zip \
    && unzip /tmp/epubcheck.zip -d /opt \
    && mv /opt/epubcheck-4.2.6 /opt/epubcheck \
    && rm /tmp/epubcheck.zip

# Add wrapper script
RUN printf '#!/bin/sh\nexec java -jar /opt/epubcheck/epubcheck.jar "$@"\n' \
      > /usr/local/bin/epubcheck \
    && chmod +x /usr/local/bin/epubcheck

# Install Node.js + npm on Alpine
RUN apk add --no-cache nodejs npm

# Copy package.json for QR code generator
COPY package.json package-lock.json* /workspace/

# Install node dependencies
RUN cd /workspace && npm install
Taming the Terminal is written using AsciiDoc and the AsciiDoctor project has conveniently created a Docker image that contains all the necessary requirements to run the build script.
The AsciiDoctor image does not contain Vale, so we added it and we threw some other tools in as well that should make our lives easier. The epubcheck checks the generated epubs for any errors that might prevent the epubs being readable in an epub-reader.
Every intro section has a QR-code to allow the users to listen to the podcast on a different device. These QR-codes are generated based on the url of audio files. The script to create the QR-codes is written in JavaScript, so node.js is added to the image.
Finally, it’s worth mentioning that the project directory inside the container is called
/workspace.
The docker-compose.yml file is also relatively short
services:
  book-builder:
    build:
      context: .
      dockerfile: Dockerfile
    working_dir: /workspace
    # Default command: run the full book build script
    command: ["sh", "-lc", "./scripts/build-book.sh"]
    volumes:
      # Mount project source into the container
      - .:/workspace
      # Keep node_modules in a Docker volume (not in your repo)
      - node_modules_cache:/workspace/node_modules

volumes:
  node_modules_cache:
The service uses the Dockerfile located in the same directory. It mounts the project directory as /workspace and it creates a named volume for the node_modules directory so our project directory is not cluttered with this directory.
The command element calls a shell script called build-book.sh. In an attempt to keep the rules in the Makefile short and readable many of the heavy lifting is moved to scripts in the scripts directory. Since this directory is also available inside the container, we can quickly fix a bug in one of those scripts without having to rebuild the image or even restart the container.
Coming back to this project after a long time, and of course not being as diligent in documenting as Allison, made it hard for me to figure out which of the script was the actual build script. That’s where Make came to the rescue.
This time all available actions are neatly documented in the Make file, along with a help rule that helps in remembering what to do.
# Default target
.DEFAULT_GOAL := help

.PHONY: help check check_episodes npm-install build shell lint lint-vale

DOCKER_STAMP := .docker-image.stamp
DOCKER_DEPS  := Dockerfile docker-compose.yml scripts/build-book.sh package.json package-lock.json

# ----------------------------------------------------------
# HELP SYSTEM
# ----------------------------------------------------------
help:  ## Show this help message
	@echo ""
	@echo "Available Make targets:"
	@echo ""
	@awk 'BEGIN { FS=":.*## " } \
		/^[a-zA-Z0-9_-]+:.*## / { \
			names[++n] = $$1; \
			descs[n] = $$2; \
			if (length($$1) > max) max = length($$1); \
		} \
		END { \
			for (i = 1; i <= n; i++) { \
				printf "  %-*s - %s\n", max, names[i], descs[i]; \
			} \
		}' $(MAKEFILE_LIST)
	@echo ""


# ----------------------------------------------------------
# CHECKS
# ----------------------------------------------------------

mp3-files:  ## Regenerate mp3_files from audio macros
	@./scripts/update-mp3_files.py

check: mp3-files check_episodes lint-vale  ## Run all checks (episodes, mp3 files, Vale)

check_episodes:  ## Validate episode list, mp3 list, URL checks, newline normalization
	@./scripts/check_episodes.sh

# ----------------------------------------------------------
# LINTING
# ----------------------------------------------------------
lint: lint-vale  ## Run all linters (currently Vale)
spellcheck: lint-vale ## Run Vale style/spell checker inside Docker (synonym for lint-vale)

lint-vale: lint-vale-error  ## Default: run Vale and show only errors

lint-vale-suggestion: docker-build  ## Vale: show suggestions, warnings, and errors
	@docker compose run --rm book-builder \
	  sh -lc 'scripts/lint-vale.sh suggestion'

lint-vale-warning: docker-build  ## Vale: show warnings and errors
	@docker compose run --rm book-builder \
	  sh -lc 'scripts/lint-vale.sh warning'

lint-vale-error: docker-build  ## Vale: show only errors
	@docker compose run --rm book-builder \
	  sh -lc 'scripts/lint-vale.sh error'

# ----------------------------------------------------------
# PARTIAL BUILDS
# ----------------------------------------------------------

html: docker-build npm-install  ## Build only the HTML version
	@docker compose run --rm book-builder \
	  sh -lc "scripts/build-book.sh html"

pdf: docker-build npm-install  ## Build only PDFs
	@docker compose run --rm book-builder \
	  sh -lc "scripts/build-book.sh pdf"

epub: docker-build npm-install  ## Build only EPUBs
	@docker compose run --rm book-builder \
	  sh -lc 'scripts/build-book.sh epub'

# ----------------------------------------------------------
# FULL BOOK BUILD
# ----------------------------------------------------------
build: npm-install mp3_files  ## Build the full HTML, EPUB, PDF output using build-book.sh inside Docker
	@docker compose run --rm book-builder

# ----------------------------------------------------------
# DOCKER BUILD
# ----------------------------------------------------------

# High-level target used everywhere (local + CI)
docker-build: $(DOCKER_STAMP)  ## Build the Docker image for the book-builder environment (if needed)

# Stamp file: updated when the image is (re)built
$(DOCKER_STAMP): $(DOCKER_DEPS)
	@docker compose build book-builder
	@touch $(DOCKER_STAMP)

# ----------------------------------------------------------
# NODE DEPENDENCIES
# ----------------------------------------------------------
npm-install: docker-build  ## Install Node dependencies inside container using node_modules volume
	@docker compose run --rm book-builder sh -lc 'if command -v npm >/dev/null 2>&1; then (npm ci || npm install); else echo "npm not found in container"; exit 1; fi'

# ----------------------------------------------------------
# INTERACTIVE SHELL
# ----------------------------------------------------------
shell: docker-build  ## Open an interactive shell in the book-builder container
	@docker compose run --rm book-builder sh
Working with this new environment made it clear that manually updating the file that is used to create the QR-codes is tedious and requires close attention to avoid errors. We could as well add the generation of that file to the QR-script.
That action also triggered a cleanup of the directory so the layout of the project directory has become much cleaner.
Once everything worked again locally, we had to address the GitHub workflows. The publish workflow suffered from similar problems as the local build system. Why not use the same Docker image and Makefile?
So the most relevant steps in the publishing workflow went from
...
- name: Setup Ruby
        if: env.GHA_WORK_TO_DO == 1
        uses: actions/setup-ruby@v1
        with:
          ruby-version: "2.7"

- name: Checkout
        if: env.GHA_WORK_TO_DO == 1
        uses: actions/checkout@v2

...

- name: Run bundle install
        if: env.GHA_WORK_TO_DO == 1
        run: |
          gem install bundler
          bundle install

- name: Publish the book
        if: env.GHA_WORK_TO_DO == 1
        run: bundle exec rake
...
to
...
- name: Checkout
        if: env.GHA_WORK_TO_DO == 1
        uses: actions/checkout@v4
...
- name: Build book via Docker (make build)
        if: env.GHA_WORK_TO_DO == 1
        run: |
          make build
...
We can now be sure that the build in the GitHub workflow uses the exact same tools we are using locally and we no longer have to worry that we forget to update the GitHub workflow when we make local changes.
Sure, the build job will take slightly longer because GitHub will have to build the image every time, but that is outweighed by the ease of use. And since this is not be a project that runs this job very frequently, it’s not a problem.
For more information on all the moving pieces, head over to the GitHub repository of Taming the Terminal.